Instructions for Krups Espresso Machine: A Comprehensive Guide
Krups delivers a sensory experience with balanced flavors via the Precision Manual Espresso XP801TGO; expert analysis ensures optimal brewing and delightful results consistently.
Understanding Your Krups Espresso Machine
Krups espresso machines are designed to bring café-quality coffee into your home, offering a range of models from manual to fully automatic. Understanding the core principles of espresso extraction is key to mastering your machine. The process relies on forcing hot water, under high pressure, through finely-ground coffee beans.
Different Krups models cater to varying levels of user involvement and preference. Manual machines require more hands-on control, allowing you to adjust parameters like grind size, tamping pressure, and brew time. Automatic and super-automatic machines simplify the process, automating many of these steps for convenience. Regardless of the model, consistent results depend on quality beans, proper grinding, and regular maintenance. The Precision Manual Espresso XP801TGO, for example, promises exquisite flavors through careful control.
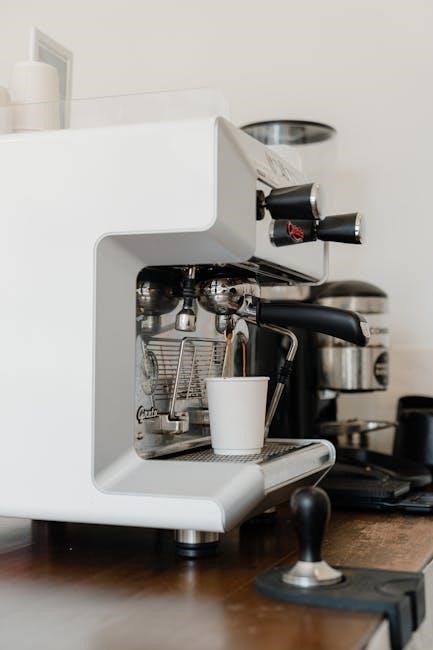
Identifying Key Components
Essential components of your Krups espresso machine include the water reservoir, providing water for brewing and steam; the brew group, where pressurized hot water meets coffee grounds; and the portafilter, holding the coffee. The steam wand, crucial for milk frothing, allows creation of lattes and cappuccinos.
Furthermore, the machine features a control panel with buttons for power, brewing, and steam functions. Many models include a drip tray to catch spills and a bean hopper (in automatic/super-automatic machines) for storing coffee beans. Understanding each part’s function, like those in the Precision Manual Espresso XP801TGO, is vital for operation and maintenance. Regular inspection ensures optimal performance and longevity of your machine, delivering consistently exquisite flavors.
Types of Krups Espresso Machines
Krups offers a diverse range of espresso machines to suit various preferences. Semi-automatic machines require user control over brew time and milk frothing, offering a hands-on experience. Automatic models automate the brewing process, controlling water volume and pressure, simplifying operation.
Super-automatic machines represent the pinnacle of convenience, grinding beans, tamping, brewing, and even frothing milk with a single touch. The Precision Manual Espresso XP801TGO exemplifies the semi-automatic category, prioritizing user skill. Choosing the right type depends on your desired level of involvement and expertise. Each type delivers a unique pathway to enjoying perfectly balanced, exquisite espresso flavors, tailored to your individual taste.
Semi-Automatic Machines
Semi-automatic Krups espresso machines, like the Precision Manual Espresso XP801TGO, place the barista firmly in control. These machines require manual operation of the brewing process – starting and stopping the espresso extraction. This hands-on approach allows for precise customization of brew time, influencing the strength and flavor profile of your espresso.
Users are responsible for grinding, tamping, and monitoring the extraction visually. Milk frothing is also typically manual, utilizing a steam wand. While demanding more skill, semi-automatic machines offer unparalleled control and the opportunity to perfect your espresso-making technique, resulting in truly exquisite and balanced flavors tailored to your preferences.
Automatic Machines
Automatic Krups espresso machines simplify the brewing process while still offering a degree of control. Unlike semi-automatic models, these machines automatically control the water volume for espresso extraction, ensuring consistent results with each brew. The user initiates the brewing cycle, but the machine handles the stopping point, delivering a pre-programmed shot volume.
This offers a balance between convenience and customization. Milk frothing often remains manual with a steam wand, allowing for practice in latte art. Automatic machines are ideal for those seeking consistent espresso quality without the full commitment of manual extraction, providing a delightful and balanced flavor experience with minimal effort.

Super-Automatic Machines
Super-automatic Krups espresso machines represent the pinnacle of convenience, automating nearly every step of the espresso-making process. These machines grind the beans, tamp the grounds, brew the espresso, and even froth the milk – all at the touch of a button. They often feature pre-programmed drink options like lattes and cappuccinos, delivering a consistent, café-quality beverage effortlessly.
While offering less manual control, super-automatic machines excel in ease of use and speed. They are perfect for busy individuals or those who prioritize convenience above all else. The integrated systems ensure balanced flavors and consistent results, minimizing user error and maximizing enjoyment of a sensory coffee journey.
Initial Setup and Preparation
Before your first cup, proper initial setup is crucial for optimal performance and longevity of your Krups espresso machine. Begin by carefully removing all packaging materials and ensuring all components are present. Thoroughly inspect the machine for any visible damage that may have occurred during shipping. Familiarize yourself with the machine’s layout and key components, referencing the user manual for detailed diagrams.

Next, prepare the machine for operation by filling the water reservoir with fresh, filtered water and installing the provided water filter. This filter significantly improves the taste of your espresso and protects the machine from scale buildup. Finally, perform a flushing cycle to cleanse the internal system – a vital step before brewing your inaugural shot, ensuring a pristine flavor profile.
Unboxing and Inspection

Carefully unpack your new Krups espresso machine, retaining the original packaging for potential future transport or warranty claims. A thorough inspection is paramount; check for any visible signs of damage incurred during shipping, such as dents, cracks, or loose parts. Verify that all included accessories are present, referencing the parts list in the accompanying manual. These typically include the portafilter, tamper, measuring scoop, and potentially milk frothing pitchers or cleaning tools.
Compare the received items against the manual’s inventory. Report any missing or damaged components to the retailer immediately. Document any observed damage with photographs as evidence. A meticulous unboxing and inspection process safeguards your investment and ensures a smooth start to your espresso journey.
Water Reservoir Filling & Filter Installation
Locate the removable water reservoir, usually at the rear or side of the machine. Detach it and rinse thoroughly with fresh water before initial use. Fill the reservoir with cool, filtered water to the maximum fill line indicated. Using filtered water is crucial; it minimizes scale buildup, prolonging the machine’s lifespan and ensuring optimal espresso flavor.
Many Krups machines utilize a water filter. If included, insert the filter into its designated housing within the reservoir or machine, following the diagram in your manual. Ensure it’s securely fitted. Prime the filter by running a full reservoir of water through the machine (see ‘First-Time Machine Operation’); Replace the filter regularly, as recommended by Krups, for continued water quality.
First-Time Machine Operation (Flushing)
Before brewing your first espresso, it’s essential to flush your Krups machine. This removes any residual manufacturing dust or impurities from the internal components. Fill the water reservoir with fresh, filtered water, ensuring it reaches the maximum fill line. Power on the machine and allow it to fully heat up, indicated by the ready light.
Without inserting a portafilter, initiate a brewing cycle as if you were making espresso. Run at least two full cycles of water through the machine, discarding the water each time. This process cleanses the system. If your machine has a steam function, also run steam through the wand for approximately 30 seconds to purge it. This initial flush guarantees a cleaner, better-tasting first brew.
Brewing Espresso: Step-by-Step
To begin, ensure your machine is fully heated and the water reservoir is filled. Grind your coffee beans to a fine consistency, suitable for espresso. Fill the portafilter basket with the ground coffee, typically around 18-21 grams, depending on your machine and preference. Tamp the grounds firmly and evenly, applying about 30 pounds of pressure for optimal extraction.
Lock the portafilter securely into the brew group. Initiate the brewing process – for semi-automatic machines, manually stop the extraction when you achieve the desired volume (around 2 ounces). Automatic machines will brew a pre-programmed amount. Observe the espresso as it extracts; it should be a rich, dark color with a creamy crema.
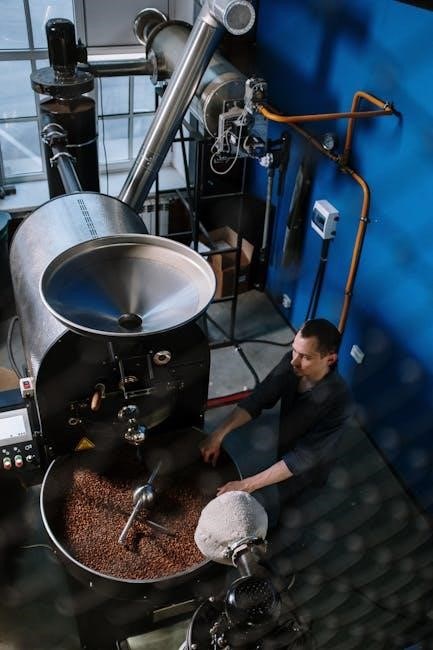
Grinding the Coffee Beans
Achieving the correct grind is paramount for excellent espresso. A burr grinder is highly recommended over a blade grinder, as it provides a consistent particle size. For Krups espresso machines, a fine grind is generally required – similar to table salt. However, the ideal setting will depend on your specific machine model and the type of bean.
Start with a medium-fine setting and adjust as needed. If the espresso brews too quickly (under 25 seconds), the grind is likely too coarse. If it brews too slowly (over 30 seconds), it’s too fine. Freshly ground beans are crucial; grind immediately before brewing to preserve aroma and flavor. Experiment to find the sweet spot for your preferred taste!
Tamping the Coffee Grounds
Proper tamping is essential for even extraction and a balanced espresso shot. After grinding, distribute the coffee grounds evenly in the portafilter basket. Use a tamper that fits the basket’s diameter precisely. Apply approximately 30 pounds of pressure, ensuring a level and consistent tamp each time.
Avoid tamping at an angle, as this can create channels for water to flow through unevenly. A firm, level tamp creates resistance, allowing the water to extract the flavors properly. Don’t over-tamp, as this can also hinder extraction. Practice makes perfect – consistent tamping is key to repeatable, high-quality espresso results with your Krups machine.
Brewing Process – Semi-Automatic
With a semi-automatic Krups machine, you control the brew duration. Securely lock the portafilter into the brew group. Immediately initiate the brewing cycle by pressing the designated button. Observe the espresso extraction; a rich, reddish-brown stream indicates proper brewing.
Typically, aim for an extraction time of 25-30 seconds for a standard double shot (approximately 2 ounces). Stop the brewing process manually by pressing the button again when the desired volume is reached. Monitor the color and consistency of the espresso – a blonde, watery stream signals over-extraction. Adjust grind size and tamping pressure for optimal results, refining your technique with each brew.
Brewing Process – Automatic/Super-Automatic
Automatic and super-automatic Krups machines simplify espresso creation. Select your desired coffee strength and volume using the machine’s control panel. For super-automatic models, ensure the bean hopper is filled with fresh coffee beans. The machine will automatically grind, tamp, and brew the espresso, delivering a consistent result with minimal user intervention.

Automatic machines may require pre-ground coffee in the portafilter. The machine handles the brewing process once activated. Monitor the extraction process; these machines typically stop automatically. Adjust settings like grind size (on super-automatic models) and coffee volume to personalize your espresso. Enjoy the convenience of consistently excellent espresso with ease.
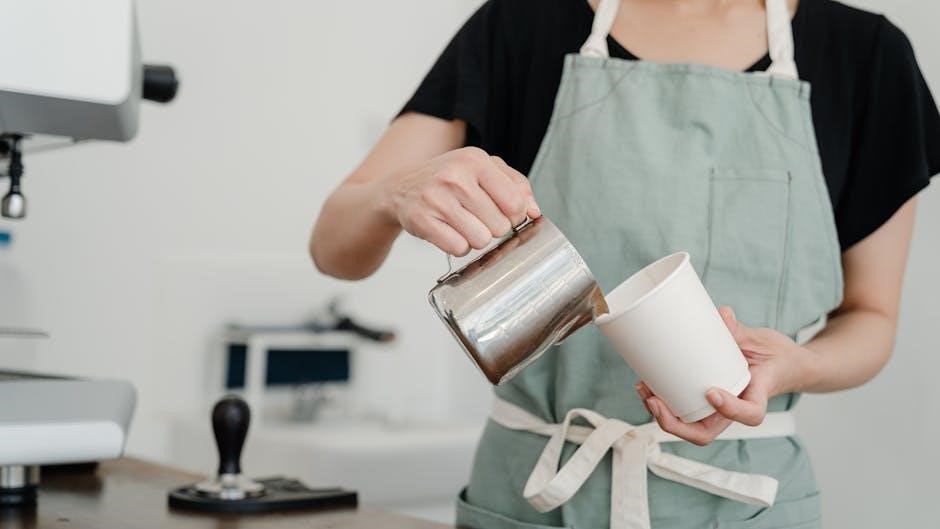
Milk Frothing Techniques
Achieving velvety microfoam is crucial for lattes and cappuccinos. Begin with cold milk – whole milk generally froths best. Purge the steam wand briefly to remove condensation. Submerge the wand tip just below the milk surface, creating a whirlpool effect. Slowly lower the pitcher as the milk expands, introducing air to create foam.
Once the volume increases by roughly 50%, submerge the wand deeper to heat the milk without adding more air. Aim for a temperature of 140-155°F (60-68°C). Tap the pitcher on the counter to eliminate large bubbles, then swirl to integrate the foam. Practice makes perfect – consistent technique yields consistently excellent milk texture for delightful coffee beverages.
Using the Steam Wand
Before each use, purge the steam wand by briefly opening the valve to release any condensed water. This ensures dry steam for optimal milk frothing. Position the wand tip just beneath the milk surface, angling it slightly to create a vortex. This vortex incorporates air, essential for creating microfoam.
Control the wand’s position to adjust the air intake; deeper immersion means less foam. Monitor the milk temperature – avoid overheating, as it scalds the milk and affects the taste. After frothing, immediately wipe down the wand with a damp cloth to prevent milk buildup. Regularly disassemble and clean the wand thoroughly to maintain hygiene and performance.
Creating Latte Art Basics
Latte art begins with perfectly textured milk – microfoam is key, resembling wet paint. Gently swirl the milk in the pitcher to integrate the foam and liquid. After brewing your espresso, hold back the foam with a spoon as you pour the liquid base into the cup, creating a canvas.

Then, slowly lower the pitcher, allowing the foam to flow and create designs. Practice basic shapes like hearts or rosettas by controlling the pour’s speed and position. Consistent practice refines your technique. A steady hand and understanding of milk flow are crucial for success. Experiment and enjoy the artistic process!
Milk Temperature and Texture
Achieving the ideal milk temperature is vital for latte art and overall espresso drink quality. Aim for 140-160°F (60-70°C); exceeding this scalds the milk, impacting its sweetness. Use a thermometer for precision, or practice judging by touch – the pitcher should be warm, but comfortable to hold.
Texture is equally important; microfoam, with tiny, velvety bubbles, is desired. Introduce air during the initial steaming phase, then submerge the wand to create a whirlpool, integrating the foam. Properly steamed milk should have a glossy sheen and a paint-like consistency, allowing for beautiful latte art creations and a luxurious mouthfeel.
Cleaning and Maintenance
Regular cleaning extends your Krups espresso machine’s lifespan and ensures optimal performance. Daily routines include wiping the exterior, emptying the drip tray, and rinsing the portafilter and brew basket. The steam wand requires immediate purging and wiping after each use to prevent milk buildup.
Periodic descaling, typically every 3-6 months depending on water hardness, removes mineral deposits that can affect brewing. Follow the machine’s descaling instructions carefully. Thoroughly cleaning the brew group—removing any residual coffee grounds—is also crucial for consistent espresso extraction and flavor. Consistent maintenance guarantees delicious coffee for years.
Daily Cleaning Procedures
To maintain your Krups espresso machine, begin each day by wiping down the exterior with a damp cloth, removing any spills or coffee residue. Empty the drip tray and rinse it thoroughly to prevent bacterial growth. The portafilter and brew basket should also be rinsed immediately after use, ensuring no coffee grounds remain.
Crucially, after frothing milk, purge the steam wand by briefly opening it to release any remaining milk. Immediately wipe the wand clean with a damp cloth to prevent milk from drying and clogging the nozzle. These simple, daily steps contribute significantly to the longevity and performance of your machine, guaranteeing consistently excellent espresso.
Descaling Your Krups Machine
Regular descaling is vital for your Krups espresso machine, preventing mineral buildup that impacts performance and taste. Use a descaling solution specifically designed for coffee machines, following the manufacturer’s instructions carefully. Typically, this involves adding the solution to the water reservoir, then running a brewing cycle without coffee.
Repeat this process with fresh water several times to thoroughly rinse the system, eliminating any residual descaling solution. The frequency of descaling depends on your water hardness; generally, every 3-6 months is recommended. Ignoring descaling can lead to costly repairs and a diminished espresso experience, so prioritize this maintenance step.
Cleaning the Brew Group
The brew group is the heart of your Krups espresso machine, requiring regular cleaning to maintain optimal function and coffee quality. After each use, wipe down the brew group with a damp cloth to remove any coffee residue. Periodically, remove the brew group (consult your machine’s manual for specific instructions) and rinse it thoroughly under running water;
Pay close attention to any crevices where coffee grounds may accumulate. For a deeper clean, use a dedicated brew group cleaning tablet, following the product’s directions. A clean brew group ensures consistent extraction and prevents bitter flavors from developing in your espresso. Neglecting this step can significantly impact your brewing results.
Troubleshooting Common Issues
Encountering problems with your Krups espresso machine is common, but often easily resolved. If the machine isn’t heating, check the power cord and ensure it’s securely plugged in. For brewing issues, verify the water reservoir is full and the machine isn’t descaling. A clogged brew group can also cause poor extraction; cleaning it may solve the problem.
Steam wand malfunctions often stem from milk residue buildup. Thoroughly clean the wand after each use. If issues persist, consult your machine’s manual for specific troubleshooting steps. Remember to always unplug the machine before attempting any repairs or cleaning beyond routine maintenance. Consistent care prevents many common problems.
Machine Not Heating Up
If your Krups espresso machine fails to heat, begin with the simplest checks. Confirm the power cord is firmly connected to both the machine and a functioning electrical outlet. Test the outlet with another appliance to rule out a power supply issue. Examine the power cord itself for any visible damage, such as fraying or cuts.
Next, ensure the machine is properly switched on; some models have a separate power switch. If the problem persists, the internal thermostat might be faulty, requiring professional repair. Avoid attempting to disassemble the machine yourself, as this could void the warranty and pose a safety risk. Always prioritize safety and consult a qualified technician.
Espresso Not Brewing Properly

When your Krups espresso machine isn’t brewing correctly, several factors could be at play. First, verify the coffee grounds are appropriately ground – too fine and they’ll clog, too coarse and the espresso will be weak. Ensure proper tamping pressure; inconsistent tamping leads to uneven extraction. Check the water reservoir is adequately filled and the filter isn’t blocked.
A clogged brew head is a common culprit; regular cleaning is vital. If the flow is slow, descaling might be necessary to remove mineral buildup. Examine the portafilter for any obstructions. If issues continue, the pump may be failing, necessitating professional service. Consistent, quality espresso relies on meticulous attention to these details.
Steam Wand Issues
Troubleshooting steam wand problems on your Krups machine requires a systematic approach. If no steam is produced, confirm the water reservoir has sufficient water and the machine has fully heated. A blocked wand is frequent; purge it immediately after each use to prevent milk buildup. Unscrew the wand tip and soak it in hot water with a descaling solution.
Weak steam often indicates mineral deposits; descaling the machine is crucial. If the wand sputters, air may be trapped – purge repeatedly. Ensure the steam dial is fully open. A faulty heating element could also be the cause, requiring professional repair. Regular cleaning and descaling are key to maintaining optimal steam wand performance.