
Wheel torque is a critical aspect of vehicle safety, ensuring proper wheel attachment. Understanding its principles, as highlighted by various online resources, is paramount for drivers and mechanics alike.
Proper wheel torque prevents loosening, which can lead to wheel detachment, and avoids stud damage from over-tightening. YouTube and other platforms emphasize its importance.
This guide will explore the nuances of wheel torque, covering tools, specifications, procedures, and troubleshooting, drawing from information available as of December 26, 2025.
What is Wheel Torque?
Wheel torque, fundamentally, is the rotational force applied to tighten the lug nuts securing a wheel to a vehicle’s hub. It’s not simply “tightening” – it’s achieving a precise level of clamping force. This force ensures the wheel remains securely attached during vehicle operation, preventing potentially catastrophic failures.
Online resources, including YouTube tutorials and automotive guides, consistently emphasize that wheel torque is measured in foot-pounds (ft-lbs) or Newton-meters (Nm). Achieving the correct torque is vital; insufficient torque risks wheel detachment, while excessive torque can damage wheel studs or distort brake rotors. Proper torque distributes the wheel load evenly.
Why is Proper Wheel Torque Important?
Maintaining correct wheel torque is paramount for vehicle safety and longevity. Under-torqued lug nuts can loosen over time due to vibration, potentially leading to wheel separation – a dangerous scenario. Conversely, over-torquing stretches and weakens the studs, increasing the risk of breakage, especially with aluminum wheels.
Resources like automotive forums and YouTube channels highlight that proper torque ensures even clamping force, preventing brake rotor warping and uneven wear. Consistent torque also protects wheel bearings and suspension components. Ignoring torque specifications compromises handling and stability, impacting driver control.
Tools Required for Wheel Torqueing
Wheel torqueing demands specific tools: a torque wrench (various types exist), a correctly sized socket set, and potentially torque sticks for quick, approximate tightening.
Torque Wrenches: Types and Selection
Torque wrenches are essential for accurate wheel nut tightening. Several types are available, each with advantages. Click-type wrenches offer an audible and tactile “click” when the desired torque is reached, providing clear feedback.
Beam-style wrenches display torque via a needle and scale, requiring visual monitoring. Digital torque wrenches provide precise readings on a screen and often store data. Selecting the right wrench involves considering the torque range needed for your vehicle.
Ensure the wrench’s range encompasses your vehicle’s specifications. Calibration is crucial for maintaining accuracy; wrenches should be periodically checked and recalibrated to guarantee reliable performance and safe wheel attachment.
Socket Sets: Ensuring a Proper Fit
Socket sets are vital companions to torque wrenches, guaranteeing a secure connection to lug nuts. Using the correct socket size is paramount; a loose fit can round off the nut, causing significant damage and safety hazards. Metric and SAE (standard) sockets are common, depending on the vehicle.
Impact sockets, designed for use with impact wrenches, are thicker and more durable. However, for torqueing, use standard sockets to ensure accurate readings. A six-point socket is preferable to a twelve-point, as it provides a more secure grip and reduces the risk of rounding.
Regularly inspect sockets for wear and tear, replacing damaged ones immediately.
Torque Sticks: A Quick Reference Guide
Torque sticks offer a rapid, albeit less precise, method for tightening lug nuts. These extensions attach to an impact wrench, limiting the applied torque to a pre-set value. They are convenient for quick installations, but should not replace a calibrated torque wrench for final tightening;
Torque sticks are color-coded, each color representing a specific torque range. Always verify the torque value of a stick before use, as markings can fade or become inaccurate. They are best suited for initial tightening before a precise torque check.
Use caution, as reliance solely on torque sticks can lead to under- or over-torquing.

Understanding Torque Specifications
Vehicle-specific torque specs are crucial for safe wheel attachment. These values, often found in the owner’s manual or online databases, dictate the correct tightening force for lug nuts.
Ignoring these specifications can lead to wheel failure or damage.
Locating Vehicle-Specific Torque Specs
Finding the correct torque specification for your vehicle is the first step in ensuring wheel safety. The owner’s manual is the primary source, providing manufacturer-recommended values for your specific make and model.
However, if the manual is unavailable, numerous online resources offer torque charts and databases. Reputable automotive websites and forums often compile this information. Always verify the data against multiple sources to confirm accuracy.
Furthermore, some wheel manufacturers provide specific torque recommendations for their products, especially aftermarket wheels. Consulting these guidelines is essential for optimal performance and safety. Ignoring proper specifications can lead to serious consequences.
Torque Charts: Interpreting the Data
Torque charts typically present specifications in foot-pounds (ft-lbs) or Newton-meters (Nm). Charts are often organized by vehicle year, make, model, and wheel type. Pay close attention to these details to locate the correct value for your setup.
Some charts differentiate torque specs based on wheel material – steel versus aluminum. Always adhere to the specified value for your wheels. Charts may also indicate separate torque values for lug nuts with different materials.
Understanding the chart’s layout and units is crucial for accurate interpretation and safe wheel installation.
Impact of Wheel Material on Torque

Wheel material significantly influences torque specifications. Steel wheels generally tolerate higher torque values due to their durability and resistance to deformation. However, aluminum alloy wheels are more susceptible to damage from over-tightening.
Aluminum requires lower torque settings to prevent stud stripping or wheel warping. Aftermarket wheels, particularly those with different materials or designs, may necessitate revised torque specs. Always verify the manufacturer’s recommendations.
Ignoring material-specific torque can lead to wheel failure and compromise safety.
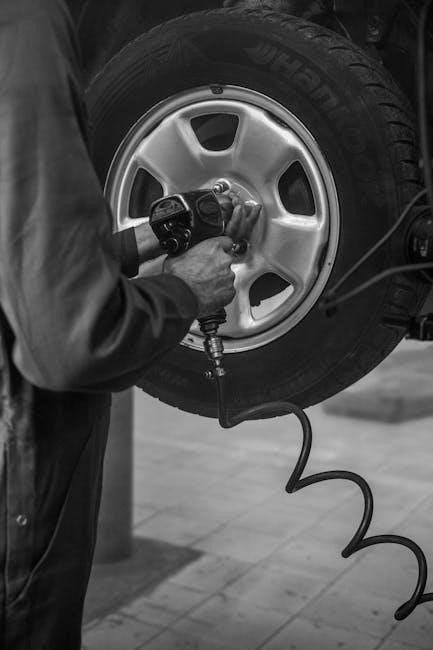
The Wheel Torqueing Process
Wheel torqueing demands a systematic approach, prioritizing safety and accuracy. Proper preparation, a star pattern, and staged tightening—initial then final—are crucial steps.
Preparation: Safety First
Before commencing wheel torqueing, prioritize safety. Park on a level surface, engage the parking brake firmly, and use wheel chocks for added security. Gather all necessary tools – torque wrench, sockets, and the vehicle’s torque specifications.
Inspect lug nuts and studs for damage, corrosion, or cross-threading. Remove any debris from the mating surfaces. Ensure the vehicle is stable and won’t roll during the process. Consider wearing safety glasses and gloves. A clean and organized workspace is also essential for efficient and safe operation.
Star Pattern Torqueing: The Correct Method
Employing a star pattern, also known as a cross pattern, is crucial for even wheel seating and preventing rotor warping. Begin by hand-tightening all lug nuts, then torque them in a star sequence – opposite nuts alternately.
This method ensures uniform pressure distribution across the wheel hub. Avoid fully tightening one nut before moving to the next. Repeat the star pattern torqueing process multiple times, gradually increasing torque in stages, to achieve accurate and reliable results.
Initial Torque and Final Torque Stages
Wheel torqueing isn’t a single-step process; it requires staged tightening. Begin with an initial torque, typically around 50-60 ft-lbs, applied in a star pattern. This seats the wheel properly against the hub.
Following the initial stage, perform a final torque to the vehicle’s specified value. Again, utilize the star pattern, ensuring each lug nut reaches the correct tightness. This two-stage approach minimizes the risk of warping and ensures secure wheel attachment, vital for safety.
Common Mistakes to Avoid
Wheel torque errors—over or under-tightening—are frequent. Cross-threading and damaging wheel studs are also common pitfalls, compromising safety and requiring costly repairs.
Over-Torquing: Risks and Consequences
Over-torquing wheel nuts exerts excessive stress on several components. Wheel studs can stretch and yield, weakening their structural integrity and potentially leading to failure. This is particularly concerning with aluminum alloy wheels, which are more susceptible to damage than steel.
Furthermore, over-tightening can distort brake rotors, causing uneven wear and reduced braking performance. It can also damage the wheel itself, cracking or warping the structure. Removing over-torqued nuts can be difficult, increasing the risk of stripping the threads or breaking the lug nuts. Always adhere to specified torque values.
Under-Torquing: Potential Hazards
Under-torquing wheel nuts presents a significant safety risk, allowing the wheel to loosen during vehicle operation. This can lead to wheel wobble, vibration, and ultimately, complete wheel detachment – a catastrophic event. Even seemingly minor under-torquing can gradually worsen as the vehicle is driven, increasing the likelihood of failure.
Insufficient torque also compromises the clamping force, reducing friction between the wheel and hub. Regular checks and re-torquing are crucial, especially after initial installation or any wheel removal, to mitigate these potentially hazardous consequences.
Cross-Threading and Damaged Studs
Cross-threading, often resulting from forcing a lug nut onto a stud at an incorrect angle, severely damages both the nut and the wheel stud. This compromises the integrity of the wheel attachment, rendering it unsafe. Damaged studs, whether from cross-threading or excessive force, weaken over time and can eventually break.
Prevention involves careful, hand-started nut alignment. If resistance is felt, stop immediately and reassess. Replacing damaged studs is essential for maintaining wheel security, requiring specialized tools and expertise to ensure proper installation.

Wheel Torque and Vehicle Type
Vehicle weight and design significantly influence optimal wheel torque. Passenger cars, trucks, SUVs, and performance vehicles each require distinct torque specifications for safe operation;
Torque Specs for Passenger Vehicles
Passenger vehicles generally require lower torque specifications compared to larger trucks or SUVs. Typically, torque values range between 80 to 100 lb-ft (108-136 Nm), but this varies significantly based on the vehicle’s make, model, and year.
Consulting the vehicle’s owner’s manual or a reliable torque chart is crucial for accurate specifications. Ignoring these guidelines can lead to wheel detachment or stud damage. Always prioritize safety and double-check the recommended torque before tightening lug nuts. Proper torque ensures secure wheel attachment during driving.
Remember that aftermarket wheels may have different torque requirements.
Torque Specs for Trucks and SUVs
Trucks and SUVs, due to their increased weight and load-carrying capacity, necessitate higher wheel torque specifications than passenger cars. Common torque ranges fall between 100 to 140 lb-ft (136-190 Nm), though heavier-duty trucks can exceed this.
Always verify the precise torque value in the vehicle’s owner’s manual or a dedicated torque chart. Consistent and accurate torque application is vital for maintaining wheel security, especially when hauling or towing. Failure to adhere to specifications can result in catastrophic wheel failure.
Regular re-torqueing is highly recommended.
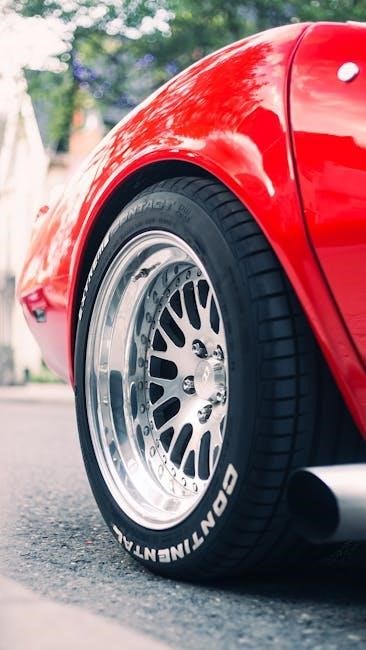
Torque Specs for Performance Vehicles
Performance vehicles, often equipped with lightweight alloy wheels and high-performance tires, require precise wheel torque. Specifications typically range from 80 to 110 lb-ft (108-149 Nm), but can vary significantly based on wheel material and design.
Over-torquing can warp rotors and damage wheels, while under-torquing compromises safety during aggressive driving. Always consult the vehicle manufacturer’s specifications or a reliable torque chart. Utilizing a calibrated torque wrench is crucial for accuracy.
Regular checks are essential for optimal performance.
Wheel Torque and Wheel Type
Wheel type significantly impacts torque specifications; steel wheels generally require higher torque than aluminum alloys. Aftermarket wheels necessitate verifying correct torque values for safety.
Steel Wheels: Torque Considerations
Steel wheels, known for their durability, typically accommodate higher torque values compared to alloy counterparts. This is due to the material’s inherent strength and resistance to deformation under pressure. Consistent and accurate torque application is still crucial, preventing loosening or stud damage.
Generally, steel wheel torque specifications fall within a specific range dictated by the vehicle manufacturer. Always consult the vehicle’s owner’s manual or a reliable torque chart to determine the precise value. Over-torquing can warp the wheel or damage the studs, while under-torquing poses a significant safety risk.
Regular re-torqueing, especially after initial installation or wheel removal, is recommended for steel wheels to maintain secure attachment and ensure optimal vehicle performance and safety.
Aluminum Alloy Wheels: Torque Sensitivity
Aluminum alloy wheels demand meticulous torque application due to their susceptibility to damage from excessive force. Unlike steel, aluminum is softer and can deform more easily, leading to warping or cracking if over-torqued. Precise adherence to manufacturer specifications is paramount for maintaining wheel integrity.
Typically, aluminum alloy wheels require lower torque values than steel wheels. Using an incorrect torque setting can compromise the wheel’s structural integrity and potentially cause failure. Consistent re-torqueing is vital, as aluminum expands and contracts with temperature changes.
Careful attention to lug nut tightening sequence and proper tool calibration are essential when working with aluminum alloy wheels.
Aftermarket Wheels: Verifying Torque Specs
Aftermarket wheels often necessitate independent torque specification verification. Relying on factory torque settings designed for original equipment wheels can be dangerous, as bolt patterns, lug seat types, and material compositions differ significantly.
Contacting the wheel manufacturer directly is crucial to obtain the correct torque value for your specific aftermarket wheel model. Ignoring this step risks wheel detachment or stud damage. Online forums and communities can offer guidance, but always prioritize official manufacturer data.
Always double-check compatibility and torque specs before installation.
Checking and Re-Torquing Wheels
Re-torquing wheels after initial installation is vital, typically after 50-100 miles. This ensures proper seating and compensates for any initial settling or vibrations.

When to Re-Torque Wheels
Re-torquing is crucial after any wheel removal or rotation, ensuring consistent and secure fastening. A standard practice involves checking torque after the first 50 to 100 miles of driving post-installation or service.
Furthermore, re-torqueing should occur after hitting a significant road hazard, like a large pothole, as this can potentially loosen the lug nuts. It’s also recommended after track days or particularly strenuous driving conditions.
Regular inspection, perhaps every 6,000 miles or with each oil change, provides an added layer of safety, confirming continued proper torque levels and preventing potential wheel detachment issues.
Procedure for Re-Torquing
Re-torquing begins with safely lifting the vehicle and loosening each lug nut slightly. Then, carefully re-tighten them using a calibrated torque wrench, following the vehicle’s specified torque specification.
Employ the star pattern – opposite nuts tightened sequentially – to ensure even pressure distribution. Perform this in stages: initially to 50-60% of the final torque, then to the full specified value.
Lower the vehicle and give a final check after a short drive. Accurate torque application is vital; avoid over-tightening or under-tightening to maintain wheel security.
Signs of Loose Wheel Nuts
Identifying loose wheel nuts is crucial for safety. Listen for clicking or clunking sounds emanating from the wheels during driving, indicating potential movement. A noticeable vibration, especially at higher speeds, can also signal a problem.
Visually inspect the wheels for any gaps between the wheel and the hub. Rust streaks around the lug nuts suggest previous loosening and movement. Regularly check and re-torque as a preventative measure.
Promptly address any suspected issues; ignoring them could lead to wheel detachment and a serious accident.
Torque and Lug Nut Materials
Lug nut material significantly impacts torque specifications. Steel nuts generally require higher torque than aluminum ones. Extended studs necessitate special consideration to avoid overstressing components.
Steel Lug Nuts: Standard Torque
Steel lug nuts are the most common type found on passenger vehicles, trucks, and SUVs. They generally adhere to standard torque specifications outlined in vehicle owner’s manuals or dedicated torque charts. Typically, these values range from 80 to 100 ft-lbs (108-136 Nm), but variations exist.

Consistent application of the correct torque is crucial with steel nuts. Over-torquing can stretch or break the studs, while under-torquing risks wheel loosening. Always use a calibrated torque wrench and follow a star pattern during tightening to ensure even pressure distribution. Re-torqueing after initial miles is recommended.
Aluminum Lug Nuts: Reduced Torque
Aluminum lug nuts, often used with alloy wheels, require significantly lower torque settings than their steel counterparts. This is due to aluminum’s softer nature and susceptibility to stretching. Typical torque specifications fall between 50-70 ft-lbs (68-95 Nm), but always verify the vehicle’s specific requirements.
Using the correct torque is paramount to avoid damaging the lug nuts or wheel studs. Over-tightening aluminum nuts can easily strip the threads. A calibrated torque wrench is essential, and a star pattern should be followed diligently. Regular re-torqueing is highly advised.
Extended Lug Nuts: Special Considerations
Extended lug nuts are frequently used with wheel spacers or to accommodate aftermarket wheels with unique hub requirements. They demand careful attention to torque specifications, often differing from factory settings. Incorrect torque can lead to wheel instability and potential failure.
Always consult the wheel spacer or wheel manufacturer’s recommendations for the appropriate torque value. Generally, extended lug nuts may require slightly higher torque than standard nuts, but this isn’t universal. A two-stage torque process is crucial, ensuring even clamping force.

Troubleshooting Wheel Torque Issues
Addressing wheel torque problems involves identifying stripped nuts, broken studs, or warped rotors. Proper diagnosis and repair are vital for maintaining vehicle safety and performance.
Stripped Lug Nuts: Causes and Solutions
Stripped lug nuts occur due to over-torquing, using incorrect sockets, or forcing damaged nuts. Repeated use and corrosion also contribute to thread damage, compromising wheel security.
Identifying a stripped lug nut involves visual inspection for rounded edges or difficulty tightening. Attempting to tighten further can worsen the damage, potentially leading to wheel detachment.
Solutions include carefully removing the damaged nut with specialized tools like a lug nut extractor. Replacement with new lug nuts of the correct specification is crucial. Addressing the underlying cause, such as proper torque application, prevents recurrence. Always inspect studs for damage too.
Broken Wheel Studs: Repair Options
Broken wheel studs are a serious safety concern, often resulting from over-torquing, corrosion, or impact damage. Identifying a broken stud requires a thorough visual inspection during wheel maintenance.
Repair options depend on the extent of the damage. Minor damage might allow for stud replacement, requiring removal of the hub assembly. Severely damaged hubs may necessitate complete hub replacement.
Professional repair is highly recommended, ensuring correct torque specifications and stud installation. Avoid driving with broken studs, as it poses a significant risk of wheel detachment and potential accidents.
Warped Rotors and Torque Impact
Warped rotors can create the illusion of loose wheel nuts, often manifesting as brake pedal pulsation. However, incorrect wheel torque doesn’t directly cause rotor warping, but exacerbates existing issues.
Uneven torque can stress the rotor, contributing to thermal distortion and accelerating warping. Proper torque ensures even pressure distribution, minimizing this risk. Regularly checking and re-torquing wheels is crucial.
Addressing warped rotors requires resurfacing or replacement. Simultaneously verifying and correcting wheel torque is essential for optimal braking performance and vehicle safety, preventing further complications.

Advanced Wheel Torque Concepts
Advanced torque techniques involve angle measurement, differentiating dynamic from static torque, and understanding lubrication’s role. These refine accuracy beyond standard torque wrench use.
Torque Angle Measurement
Torque angle measurement represents a sophisticated refinement of the wheel torqueing process, moving beyond simply achieving a specified torque value. It involves tightening the lug nuts to an initial torque, then further tightening them by a specific number of degrees.
This method accounts for the elasticity of the wheel studs and hub, ensuring a more consistent and accurate clamping force. It’s particularly valuable for vehicles with aluminum wheels or those subjected to high stresses. Utilizing a digital torque wrench with angle measurement capability is essential for precise execution.
This technique minimizes the risk of both over-torquing and under-torquing, contributing to enhanced wheel security and longevity of components.
Dynamic Torque vs. Static Torque
Dynamic torque refers to the torque applied while the vehicle is in motion, influenced by factors like centrifugal force and road vibrations. It’s a crucial consideration, as these forces can reduce the clamping force achieved through static torque – the torque applied when the vehicle is stationary.
Therefore, relying solely on static torque specifications may not guarantee wheel security during operation. Re-torqueing after a short driving distance is recommended to counteract dynamic torque losses.
Understanding this distinction emphasizes the importance of periodic wheel checks and proper maintenance practices for optimal safety.
The Role of Lubrication in Torque Accuracy
Lubrication of wheel studs and lug nuts significantly impacts torque accuracy. A thin layer of approved lubricant reduces friction between the threads, allowing the lug nut to achieve the specified clamping force at the designated torque value.
However, excessive lubrication can lead to inaccurate readings, potentially resulting in under-torqued fasteners.
Manufacturers often provide specific lubricant recommendations; following these guidelines is crucial. Consistent application ensures reliable wheel attachment and prevents issues stemming from inconsistent friction levels.