Kenmore Sewing Machine 385: A Comprehensive Manual Guide
This detailed guide offers comprehensive instructions for operating your Kenmore 385 sewing machine, covering safety, setup, basic and advanced techniques, and troubleshooting.
Welcome! This manual serves as your complete resource for the Kenmore 385 sewing machine, a reliable and versatile tool designed for household use. Manufactured by Kenmore, this model offers a range of features suitable for both beginners and experienced sewers.
The Kenmore 385 is known for its durability and ease of use, capable of handling various fabrics and projects, from simple alterations to more complex creations. This guide will walk you through every aspect of your machine, ensuring you can unlock its full potential.
Whether you’re new to sewing or looking to refresh your skills, this manual provides clear, step-by-step instructions, safety guidelines, and troubleshooting tips. We’ll cover everything from initial setup and threading to advanced techniques and resolving common issues. Let’s begin your sewing journey with the Kenmore 385!
Model Variations & Identifying Your Machine
Kenmore 385 sewing machines come in several variations, often denoted by a series of numbers following the base model (e.g., 385.17620, 385.19005). While core functionality remains consistent, slight differences in features or included accessories may exist between these versions.
Identifying your specific model is crucial for accessing the correct parts and support. Locate the model number plate, typically found on the back or underside of the machine. This plate displays the complete model number, essential for ordering replacement parts or downloading specific manuals.
Referencing this number ensures compatibility and accurate information. Online resources and parts suppliers utilize these model numbers for precise identification. This manual aims to cover the most common features across the 385 series, but always confirm compatibility with your specific model number when performing maintenance or repairs.
Safety Instructions
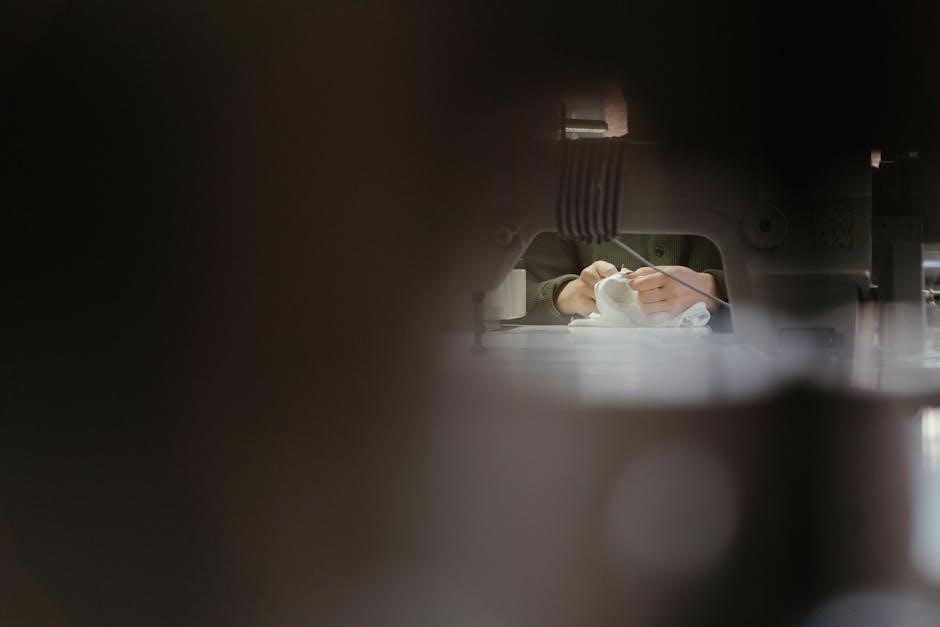
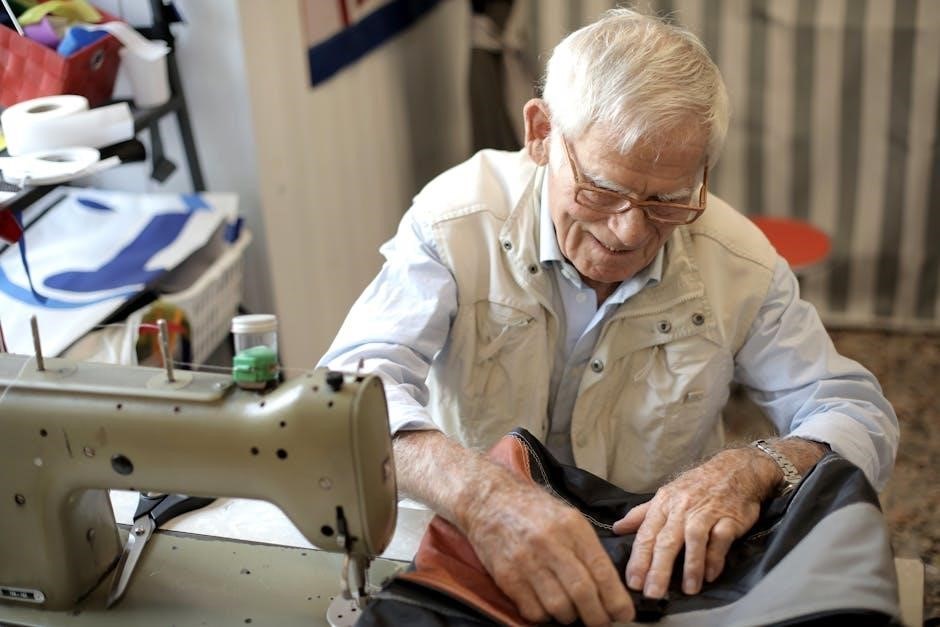
Prioritize safety when operating your Kenmore 385 sewing machine. This machine is designed for household use only; industrial applications are strictly prohibited. Always disconnect the power supply before performing any maintenance, such as changing the needle or cleaning.
Keep fingers away from moving parts, particularly the needle and presser foot, during operation. Never attempt to sew over broken needles; Ensure the machine is stable and placed on a level surface before use.
Supervise children closely when the machine is in use or stored nearby. This machine contains small parts that could pose a choking hazard. Regularly inspect the power cord for damage and replace if necessary. Follow all electrical safety guidelines to prevent shock or fire hazards.
General Safety Precautions
Always read the entire manual before operating your Kenmore 385. Familiarize yourself with all controls and features. Never leave the machine unattended while it’s running. Keep the work area well-lit and free of clutter to prevent accidents.
Avoid wearing loose clothing or jewelry that could become entangled in the machine’s moving parts. Use the correct needle type and size for your fabric to prevent breakage and potential injury. Do not force the fabric under the needle; let the machine feed it smoothly.
Regularly clean the machine to remove lint and debris, which can cause malfunctions and pose a fire hazard. Store the machine in a safe, dry place when not in use, and keep it out of reach of children.
Electrical Safety Guidelines
Ensure the sewing machine is properly grounded to prevent electric shock. Only connect the machine to a power outlet that matches the voltage specified on the machine’s nameplate. Never operate the machine with a damaged power cord or plug; replace them immediately.
Avoid using extension cords if possible. If one is necessary, ensure it’s heavy-duty and properly rated for the machine’s power consumption. Never immerse the machine, power cord, or plug in water or other liquids. Disconnect the machine from the power outlet before cleaning, changing the needle, or performing any maintenance.
Do not attempt to repair the machine yourself; contact a qualified service technician for any electrical issues. Keep the power cord away from heat, oil, and sharp edges. Always unplug the machine when not in use to prevent accidental activation.
Setting Up Your Kenmore 385
Proper setup involves threading, needle installation, and understanding key components for optimal performance. Follow these steps to prepare your machine for sewing projects.
Threading the Machine
Correct threading is crucial for smooth sewing operation. Begin by raising the presser foot; this opens the tension discs, allowing the thread to seat properly. Guide the thread from the spool pin, through the first thread guide, and then down to the tension assembly. Ensure the thread is firmly inserted between the tension discs.
Next, continue threading through the take-up lever, ensuring it’s in its highest position. Follow the threading path down to the needle bar, and finally, thread the needle from front to back. A properly threaded machine minimizes tension issues and ensures consistent stitch formation. Refer to the machine’s diagrams for precise threading routes, as variations may exist.
Upper Threading Procedure

Begin with the spool pin, placing your thread spool securely. Guide the thread down to the first thread guide, ensuring it catches the thread properly. Next, lead the thread to the tension discs – confirm it’s nestled firmly between them. Raise the presser foot; this is vital for opening the tension, allowing correct thread seating.
Continue threading upwards to the take-up lever, making sure it’s at its highest point. Then, follow the path down to the needle bar, and finally, thread the needle from front to back using a needle threader if needed. A correctly threaded upper section prevents skipped stitches and ensures consistent tension. Always double-check the threading path against the machine’s diagram.
Bobbin Winding and Insertion
Start by placing the spool on the spool pin and guide the thread to the bobbin winding tension disc. Then, thread the end through several bobbin winding guides, ensuring a smooth path. Secure the thread end through a hole in the bobbin itself, and place the bobbin onto the bobbin winder spindle.
Engage the bobbin winder by pushing the spindle to the right. Press the foot pedal gently to begin winding; the machine will automatically stop when full. Once wound, disengage the winder. To insert, open the bobbin case cover and place the bobbin in, ensuring it rotates in the correct direction (clockwise typically). Finally, guide the thread through the tension spring and close the cover.
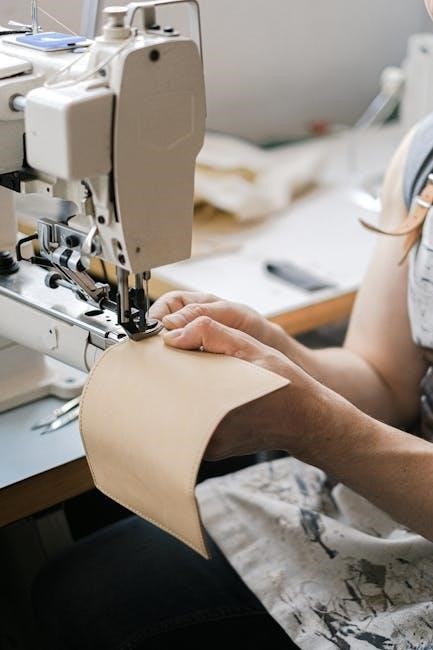
Installing the Needle
Ensure the power is off before changing the needle. Locate the needle clamp screw on the machine head and loosen it with the screwdriver. Gently raise the needle to its highest position using the handwheel. Insert the new needle, with the flat side facing the back of the machine, pushing it firmly up into the needle clamp.
Tighten the needle clamp screw securely, but avoid over-tightening. Always use the correct needle type and size for your fabric. Universal needles work for many fabrics, while ballpoint needles are best for knits; Refer to your fabric guide for recommendations. A bent or damaged needle should be replaced immediately to prevent fabric damage or machine malfunction.
Needle Types and Sizes
Selecting the right needle is crucial for optimal sewing performance. Universal needles (size 80/12, 90/14, 100/16) suit woven fabrics. Ballpoint needles (size 75/11, 90/14) prevent snagging knit fabrics. Denim needles (size 90/14, 100/16) are designed for heavier materials like denim. Stretch needles are ideal for highly elastic fabrics like spandex.
Needle size corresponds to fabric weight; smaller numbers for lightweight fabrics, larger for heavier ones. A general guideline: 60/8 for chiffon, 70/10 for voile, 80/12 for quilting cotton, 90/14 for linen, and 100/16 for canvas. Always consult your fabric’s recommendations. Using the incorrect needle can cause skipped stitches, fabric puckering, or needle breakage.
Replacing the Needle
To replace the needle, ensure the machine is turned off and unplugged. Loosen the needle clamp screw using the screwdriver included with your Kenmore 385. Gently pull the old needle downwards. Insert a new needle with the flat side facing the back of the machine. Push it up as far as it will go.
Tighten the needle clamp screw securely, but avoid over-tightening. A loose needle can cause issues, while an overly tight screw might damage the clamp. Always dispose of used needles safely in a designated sharps container. Regularly replacing the needle – even if not bent – ensures consistent stitch quality and prevents fabric damage. Inspect the needle before each use for any signs of wear or damage.

Basic Operation
Mastering the fundamentals involves stitch selection, adjusting length and width, and understanding tension control for optimal sewing results with your Kenmore 385.
Stitch Selection
Your Kenmore 385 offers a variety of stitches to suit diverse sewing projects. Understanding these options is crucial for achieving professional results. The machine features both straight and zigzag stitch capabilities, each with adjustable settings.
Straight Stitch Settings
The straight stitch is ideal for constructing seams, topstitching, and basting. Adjust the stitch length dial to modify the stitch size; shorter stitches are suitable for delicate fabrics, while longer stitches work well with heavier materials. Experiment to find the optimal length for your fabric type.
Zigzag Stitch Settings
The zigzag stitch provides elasticity and is perfect for finishing raw edges, creating decorative effects, and sewing stretch fabrics. Adjust both the stitch width and length to customize the zigzag pattern. Wider zigzag stitches are excellent for preventing fabric fraying, while narrower stitches are ideal for appliqué.
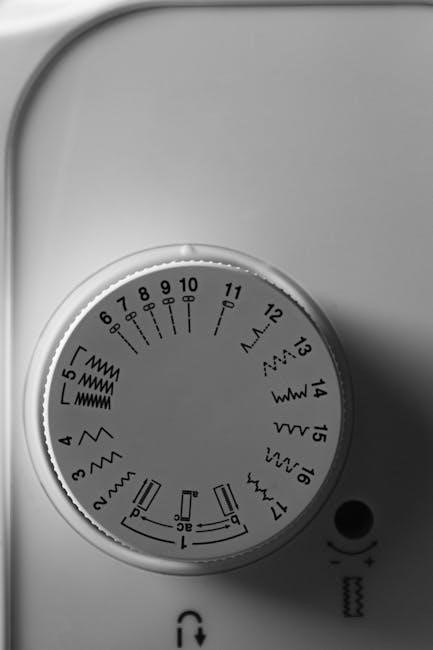
Refer to the stitch guide diagram printed on the machine for visual examples of each stitch and its recommended settings.
The straight stitch is the workhorse of sewing, essential for constructing garment seams, quilting, and various general sewing tasks. On your Kenmore 385, achieving a perfect straight stitch relies on precise length adjustment. Utilize the stitch length dial, typically marked with numbers indicating stitch size.
For lightweight fabrics like silk or voile, a shorter stitch length (around 2.0-2.5mm) provides greater security and prevents puckering. Medium-weight fabrics such as cotton or linen benefit from a standard stitch length (2.5-3.0mm). Heavier materials like denim or canvas require a longer stitch length (3.5-4.0mm) to ensure sufficient penetration and durability.
Always test your stitch length on a scrap of the fabric you’ll be using to confirm it’s appropriate before starting your project. Consistent stitch length is key to a professional finish.
The zigzag stitch on your Kenmore 385 offers versatility beyond simple seams, ideal for finishing raw edges, creating decorative elements, and sewing stretch fabrics. Adjusting both the stitch width and length is crucial for optimal results. The stitch width dial controls the side-to-side deviation of the needle, while the length dial dictates the distance between each stitch.
For preventing fabric fraying, a narrow zigzag (width 1.0-2.0mm, length 2.0-2.5mm) is effective. When sewing knits, a wider zigzag (width 3.0-4.0mm, length 2.5-3.0mm) allows for fabric stretch without breaking the thread. Decorative zigzag patterns can be achieved by experimenting with wider widths and varying lengths.
Always test on scrap fabric to ensure the zigzag stitch accommodates the fabric’s stretch and weight, preventing puckering or thread breakage.
Adjusting Stitch Length and Width
Precise stitch control is fundamental to successful sewing with your Kenmore 385. The stitch length dial, typically marked with numbers, determines the distance between individual stitches. Shorter stitch lengths (1.0-1.5mm) are ideal for delicate fabrics and intricate details, providing increased strength and preventing puckering. Longer stitch lengths (2.5-3.0mm) are suitable for basting, gathering, or heavier fabrics.
The stitch width dial governs the breadth of zigzag and decorative stitches. A width of ‘0’ produces a straight stitch. Increasing the width creates wider zigzag patterns, useful for finishing edges or sewing stretch materials. Experimentation is key to achieving desired effects.
Always test settings on scrap fabric before beginning your project. Incorrect settings can lead to skipped stitches, thread breakage, or fabric distortion. Refer to stitch guides for recommended settings based on fabric type and application.
Tension Adjustment
Proper thread tension is crucial for forming balanced, secure stitches. The Kenmore 385 features tension dials for both the upper and bobbin threads. Incorrect tension results in looping, puckering, or thread breakage. Begin with the default settings (typically ‘4’ on most dials).
If loops form on the underside of the fabric, the upper tension is likely too loose; increase the upper tension dial setting incrementally. Conversely, if loops form on the top, the upper tension is too tight; decrease the setting. Bobbin tension adjustments are less frequent but can be made with a small screwdriver.
Always re-thread both the upper and bobbin threads when adjusting tension. Test adjustments on scrap fabric mirroring your project material. A balanced stitch will have no visible loops and lie flat.
Advanced Features & Techniques
Explore specialized techniques like utilizing various presser feet and mastering troubleshooting for common issues to unlock the full potential of your Kenmore 385.
Using Presser Feet
Presser feet are essential for diverse sewing projects, expanding the capabilities of your Kenmore 385. The standard presser foot is ideal for everyday stitching, providing consistent pressure for straight and zigzag stitches. Proper installation ensures smooth fabric feeding and even stitch formation.
For specialized tasks, consider the zipper foot application. This foot allows precise stitching close to zipper teeth, creating professional-looking results. Its narrow design navigates tight spaces effectively. Experiment with different presser feet – available separately – to tackle buttonholes, blind hems, and decorative stitching. Always refer to your machine’s manual for correct foot selection and attachment procedures. Using the correct foot dramatically improves stitch quality and project outcomes.
Standard Presser Foot
The standard presser foot, included with your Kenmore 385, is the workhorse for most sewing applications. It’s designed for general-purpose stitching, handling a wide range of fabrics from lightweight cotton to medium-weight denim. Ensuring it’s correctly attached is crucial for consistent stitch quality; a secure snap-on connection prevents fabric bunching or uneven feeding.
This foot excels with straight and zigzag stitches, providing uniform pressure across the fabric surface. Regularly check for dust or lint buildup underneath, as this can impede smooth movement. Proper cleaning maintains optimal performance. When changing fabrics, verify the foot remains securely fastened. Mastering the standard foot is fundamental to unlocking the full potential of your Kenmore 385 sewing machine.
Zipper Foot Application
The zipper foot, a specialized attachment for your Kenmore 385, simplifies sewing along zipper tapes. Unlike the standard foot, it allows stitching incredibly close to the zipper teeth, creating a professional finish. This foot can be positioned on either the left or right side, accommodating various zipper insertion techniques.
To use it, snap it onto the presser foot shank. Carefully align the zipper teeth with the guide on the foot, ensuring consistent proximity throughout the stitching process. Reduce presser foot pressure slightly for smoother gliding. Practice on scrap fabric first to master the technique. Proper zipper foot application results in neat, even seams, enhancing the overall quality of your projects. It’s an essential tool for garment construction and alterations.
Troubleshooting Common Issues
Encountering problems with your Kenmore 385 is common, but often easily resolved. Thread breakage frequently stems from incorrect threading, a dull needle, or improper tension. Always re-thread the machine following the manual’s diagrams and replace the needle. Skipped stitches can indicate a bent needle, incorrect needle size for the fabric, or timing issues – consult a qualified technician for timing adjustments.
If fabric puckers, adjust the presser foot pressure or tension. For uneven stitching, ensure consistent fabric feeding and proper stitch length settings. Regularly clean lint buildup, as this can impede smooth operation. Refer to the manual’s diagrams for detailed troubleshooting steps. If issues persist, seeking professional repair is recommended.
Thread Breakage Problems
Frequent thread breakage on your Kenmore 385 often points to a few key culprits. First, meticulously re-thread the upper thread, ensuring it’s correctly seated in the tension discs and needle clamp – improper threading is a common cause. Next, inspect and replace the needle; a bent or dull needle significantly increases breakage. Confirm you’re using the correct needle type and size for your fabric weight;
Adjusting thread tension is crucial; too tight tension strains the thread. Also, check the bobbin winding – uneven winding can lead to breaks. Ensure the thread path is clear of lint and debris. Finally, verify the thread spool is rotating freely. If problems continue, a professional machine service may be necessary.
Skipped Stitch Solutions
Experiencing skipped stitches with your Kenmore 385? Begin by replacing the needle – a dull or damaged needle is a primary cause. Ensure the needle is correctly inserted, with the flat side facing the correct direction. Verify you’re using the appropriate needle type and size for your fabric; lightweight fabrics require finer needles.
Check the threading, confirming the upper thread is properly seated in the take-up lever and tension discs. Adjust the presser foot pressure; insufficient pressure can cause skipped stitches. Also, examine the bobbin area for lint or debris, and ensure the bobbin is correctly inserted. Finally, try re-threading the lower thread. If issues persist, professional servicing might be needed.