
Exmark Troubleshooting Manual: A Comprehensive Guide
This manual provides detailed guidance for diagnosing and resolving issues with Exmark mowers,
covering engine problems, drive systems, cutting decks, and electrical components.
Resources like ManualsLib offer valuable diagrams and operational insights for effective repairs.
Effective troubleshooting of Exmark equipment requires a systematic approach, beginning with a clear understanding of the machine’s operation and potential failure points. This guide serves as an introductory resource for both seasoned professionals and DIY enthusiasts tackling Exmark mower repairs. Before diving into specific issues, familiarize yourself with the relevant operator’s manual and safety precautions.
Resources like ManualsLib provide access to detailed schematics and troubleshooting flowcharts specific to various Exmark models, including the Lazer Z HP series. Understanding the interplay between the engine, hydrostatic drive, cutting deck, and electrical system is crucial. Common problems often stem from routine maintenance neglect, such as dirty air filters, worn belts, or dull blades. A proactive maintenance schedule significantly reduces the likelihood of encountering major issues. This introduction sets the stage for a more in-depth exploration of specific troubleshooting procedures.
Understanding Exmark Model Numbers
Decoding an Exmark model number is fundamental for accurate troubleshooting and parts identification. These numbers aren’t random; they contain vital information about the mower’s specifications and manufacturing details. Typically, an Exmark model number consists of several characters indicating the product line, cutting deck size, engine type, and build date.
For example, within the Lazer Z HP series, variations in the model number denote differences in horsepower, deck size (like a 42-inch deck), and specific features. Accessing resources like operator’s manuals – often found on sites like ManualsLib – allows you to decipher the code. Knowing the precise model number ensures you obtain the correct replacement parts and access the appropriate troubleshooting guides. Incorrect parts can lead to further complications, so accurate identification is paramount for successful repairs and maintaining optimal performance.
Safety Precautions Before Troubleshooting
Prioritizing safety is crucial before attempting any Exmark mower troubleshooting. Always disconnect the spark plug wire from the spark plug to prevent accidental engine starts. Ensure the mower is parked on a level surface and the parking brake is firmly engaged. Wear appropriate personal protective equipment (PPE), including safety glasses and work gloves, to shield against debris and potential hazards;
Never work on the mower while the engine is running or hot. Allow sufficient cooling time before inspecting or repairing components. Be mindful of sharp blades and moving parts. If working with the fuel system, ensure adequate ventilation and avoid open flames. Refer to the Exmark operator’s manual for specific safety guidelines related to your model. Ignoring these precautions can result in serious injury.
Common Exmark Problems: Overview
Exmark mowers, while robust, can experience recurring issues. Engine problems frequently involve difficulty starting, rough running, or overheating – often linked to fuel delivery or ignition components. Drive system failures commonly manifest as hydrostatic drive issues or broken/worn belts, impacting movement. Cutting deck concerns include bent or dull blades, uneven cutting due to leveling problems, and spindle malfunctions.
Electrical issues, such as battery problems and starter failures, can also arise. ManualsLib highlights troubleshooting steps for these common faults. Regular maintenance, including blade sharpening, belt inspections, and fluid checks, can prevent many of these problems. Identifying the specific symptoms is key to efficient diagnosis and repair, ensuring optimal mower performance.

Engine Troubleshooting
Addressing engine issues requires checking fuel lines, spark plugs, and the air filter for obstructions, ensuring proper combustion and operation.
Engine Won’t Start
When your Exmark engine fails to start, systematically check several key components. First, verify the fuel tank isn’t empty and the fuel shut-off valve is open. Inspect the spark plug for fouling or damage; a faulty spark plug prevents ignition. Ensure the spark plug wire is securely connected.
Next, examine the air filter – a clogged filter restricts airflow, hindering starting. Confirm the battery is fully charged and the connections are clean and tight. A weak battery can’t provide sufficient power to the starter. Check the safety switches, including the operator presence switch and blade engagement switch; these must be engaged for the engine to start.
Finally, if the engine cranks but doesn’t fire, suspect a carburetor issue or low compression. Consulting the Exmark operator’s manual and resources like ManualsLib can provide specific diagrams and troubleshooting steps for your model.
Engine Runs Rough
A rough-running Exmark engine typically indicates an issue with fuel delivery, air intake, or combustion. Begin by inspecting the air filter; a dirty filter restricts airflow, causing a rich fuel mixture. Check the fuel filter for clogs, which can starve the engine of fuel. Examine the spark plug – fouling or wear can lead to misfires and rough operation.
Verify the carburetor is clean and properly adjusted. A dirty carburetor can disrupt the fuel-air mixture. Inspect the fuel lines for kinks or leaks, ensuring a consistent fuel supply. Low compression can also cause rough running; a compression test can diagnose this issue.
Consult your Exmark operator’s manual and online resources like ManualsLib for model-specific troubleshooting guidance and diagrams. Addressing these areas systematically will help restore smooth engine performance.
Engine Overheating
Engine overheating in an Exmark mower is a serious issue demanding immediate attention. The primary culprits often involve cooling system deficiencies. Begin by checking the oil level; low oil reduces lubrication and increases friction, generating excessive heat. Inspect the cooling fins on the engine cylinder – debris buildup restricts airflow.
Ensure the fan is operating correctly, as it’s crucial for drawing air across the cooling fins. A faulty thermostat can prevent coolant circulation (if applicable). Examine the fuel mixture; a lean mixture can cause higher combustion temperatures. Check for exhaust restrictions, like a clogged muffler.
Refer to your Exmark manual and resources like ManualsLib for specific cooling system diagrams and troubleshooting steps. Ignoring overheating can lead to severe engine damage, necessitating costly repairs.
Drive System Troubleshooting
Addressing drive issues involves inspecting belts, hydrostatic components, and drive wheels for wear or damage, ensuring smooth operation and optimal performance.
Hydrostatic Drive Issues
Hydrostatic drive problems often manifest as a lack of power, jerky movement, or unusual noises during operation. Begin by checking the hydraulic fluid level and condition; low or contaminated fluid is a common culprit. Inspect the drive belt for wear, cracks, or proper tension, as slippage can significantly impact performance.
Further investigation should include examining the hydrostatic pump and motor for leaks or internal damage. A failing pump can cause a complete loss of drive, while a motor issue may result in reduced speed or erratic behavior. Consult your Exmark operator’s manual for specific troubleshooting steps related to your model. Resources like ManualsLib can provide detailed diagrams to aid in identifying components and understanding the system’s operation. Remember to disconnect the spark plug wire before performing any maintenance on the drive system for safety.
Belt Problems and Replacement
Drive belt issues are frequent in Exmark mowers, presenting as slipping, squealing, or breakage. A worn or damaged belt compromises power transfer to the cutting deck. Regularly inspect belts for cracks, fraying, or glazing – signs indicating imminent failure. Proper tension is crucial; too loose, and it slips, too tight, and it strains components.
Replacement requires identifying the correct belt for your specific Exmark model. Diagrams available on sites like ManualsLib are invaluable for this. Disconnect the spark plug before starting. Relieve tension on the idler pulleys, remove the old belt, and install the new one, ensuring correct routing. Verify proper tension after installation. A correctly installed and tensioned belt restores optimal cutting performance and prevents further damage to the drive system. Always refer to your Exmark manual for detailed instructions and safety precautions.
Drive Wheel Issues
Problems with drive wheels often manifest as uneven mowing, difficulty steering, or a complete loss of traction. Common causes include worn tires, damaged wheel bearings, or issues within the drive system connecting to the wheels. Inspect tires for proper inflation and tread wear; replace if necessary. Check for play in the wheel bearings – excessive movement indicates wear and the need for replacement.
Investigate the drive linkage for any loose or broken components. Ensure the drive chains or belts (depending on the model) are correctly tensioned and undamaged. If a wheel isn’t engaging, the issue could stem from the differential or the drive motor. Consult diagrams from resources like ManualsLib to understand the specific drive system of your Exmark model. Always disconnect the spark plug before performing any repairs to the drive wheel assembly for safety.
Cutting Deck Troubleshooting
Addressing deck issues involves inspecting blades, leveling, and spindles for optimal cutting performance. Proper maintenance ensures a clean and even cut quality.
Blade Problems: Bent, Dull, or Loose
Blade issues are a frequent cause of poor cutting performance in Exmark mowers. Bent blades create an uneven cut and can cause excessive vibration, potentially damaging the spindle. Always inspect blades for bends before each use, and replace any damaged ones immediately. Dull blades tear the grass instead of cutting it cleanly, leading to a brown and unhealthy lawn; sharpening blades regularly is crucial.
Loose blades pose a significant safety hazard and can fly off during operation. Ensure blade bolts are tightened to the manufacturer’s specified torque. Regularly check for any signs of loosening, especially after hitting an obstruction. When replacing blades, always use genuine Exmark replacement parts and follow the correct installation procedure. Remember to balance the blades after sharpening to prevent vibration and ensure a smooth, consistent cut. Proper blade maintenance extends the life of your mower and delivers professional-quality results.
Deck Leveling Issues
Proper deck leveling is essential for achieving a consistent and professional cut with your Exmark mower. An unleveled deck results in scalping in some areas and uncut grass in others, creating an uneven lawn appearance. Checking deck leveling involves measuring the distance from the blade tips to the ground at multiple points around the deck.
Adjusting the deck typically requires loosening the deck hanger brackets and using shims or adjustable linkages to raise or lower specific corners. Always consult your Exmark operator’s manual for the specific leveling procedure for your model. Regularly inspect the deck for any signs of damage or wear that could affect leveling, such as bent hangers or worn adjustment points. Maintaining a properly leveled deck ensures optimal cutting performance and a beautifully manicured lawn. Accurate leveling minimizes stress on the mower and extends its lifespan.
Spindle Problems
Spindle issues on an Exmark mower often manifest as excessive vibration, unusual noises during operation, or uneven cutting. Common problems include worn spindle bearings, damaged spindle housings, or loose mounting bolts. Diagnosing spindle problems requires a thorough inspection, checking for play in the spindle assembly and any signs of physical damage.

Replacing a spindle typically involves removing the blade, belt, and any associated hardware, then unbolting the old spindle and installing the new one. Always ensure the new spindle is properly lubricated before installation. Regularly inspect spindles for wear and tear, and address any issues promptly to prevent further damage to the deck or other components. Ignoring spindle problems can lead to costly repairs and reduced mowing performance. Proper maintenance extends spindle life.
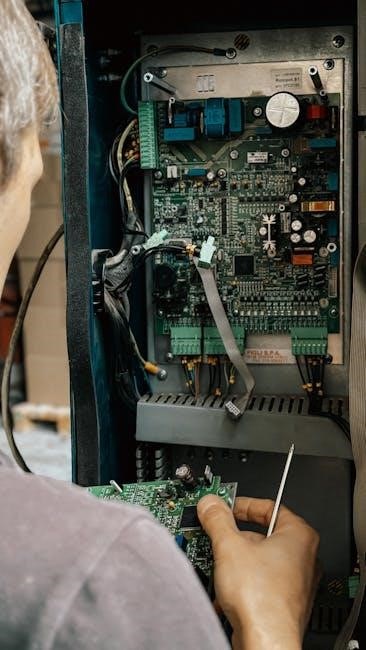
Electrical System Troubleshooting
Addressing electrical faults involves checking the battery, starter, wiring, and safety switches for proper function, ensuring reliable mower operation and safety.

Battery Issues and Charging
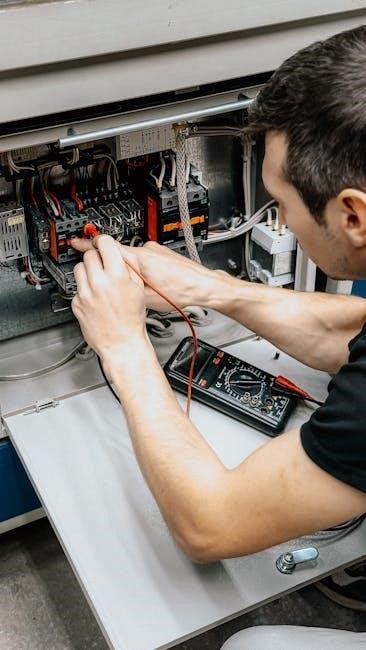
Diagnosing battery problems begins with a voltage test; a fully charged 12-volt battery should read around 12.6 volts. If the voltage is low, attempt to charge the battery using a compatible Exmark charger. Ensure the charger is functioning correctly and the connections are clean and secure.
Common issues include corroded terminals, a sulfated battery (due to prolonged undercharging), or a failing battery internally. Clean corrosion with a baking soda and water solution. If the battery won’t hold a charge, it likely needs replacement.
Check the charging system – verify the alternator or stator is producing the correct voltage while the engine is running. A faulty charging system will prevent the battery from recharging. Refer to your Exmark model’s service manual for specific voltage specifications and testing procedures. Proper battery maintenance is crucial for optimal performance.
Starter Problems
When an Exmark mower fails to start, the starter is a prime suspect. Begin by checking the battery voltage – a weak battery is a frequent cause. Next, inspect the starter solenoid; listen for a click when the key is turned, indicating it’s receiving power. If no click, check the solenoid’s wiring and fuse.
A faulty starter motor itself will require testing with a multimeter to confirm it’s receiving voltage and ground. If voltage is present but the starter doesn’t engage, the starter motor is likely defective and needs replacement.
Don’t overlook the safety switches – ensure the seat switch and brake/clutch switch are functioning correctly, as these prevent the starter from engaging. Consult your Exmark’s wiring diagram for specific switch locations and testing procedures.
Resources for Exmark Troubleshooting
Successfully troubleshooting your Exmark mower often relies on accessing reliable resources. ManualsLib (manualslib.com) is an excellent source for downloadable operator manuals and parts lists, providing detailed diagrams and troubleshooting steps specific to your model. Websites like MitchTech and various online forums dedicated to lawn care equipment offer community support and shared experiences.
Exmark’s official website (exmark.com) provides access to service manuals, parts catalogs, and dealer locators. YouTube hosts numerous videos demonstrating common repairs and maintenance procedures. Remember to always verify information from multiple sources and prioritize safety when performing any repairs. Utilizing these resources will empower you to diagnose and resolve issues efficiently, keeping your Exmark mower running smoothly.