
Glaze Coat Instructions: A Comprehensive Guide
Glaze coats offer a simple sweetness for scones, muffins, and cookies, setting to a soft firmness—ideal for stacking without smudging. Explore recipes for classic, extra-firm, and reduced-sugar options!
Understanding Glaze Types
Glazes aren’t one-size-fits-all; understanding the variations is key to achieving your desired finish. From the foundational classic sugar glaze, offering an opaque and firm set, to options tailored for specific needs, the possibilities are diverse. For detailed work requiring a robust base, an extra-firm glaze provides stability.
Conversely, those seeking a lighter touch can opt for a softer-set glaze, achieved by reducing the sugar content, resulting in a gentler sweetness and texture. Beyond these, translucent glaze finishes offer a delicate sheen, allowing the underlying treat to subtly show through. And for a truly show-stopping effect, the mirror glaze delivers an unparalleled, reflective shine.
Each type utilizes different ratios of sugar to liquid, impacting not only the texture but also the overall aesthetic. Consider the final presentation and intended use when selecting the appropriate glaze for your baking creations.
Classic Sugar Glaze: The Foundation
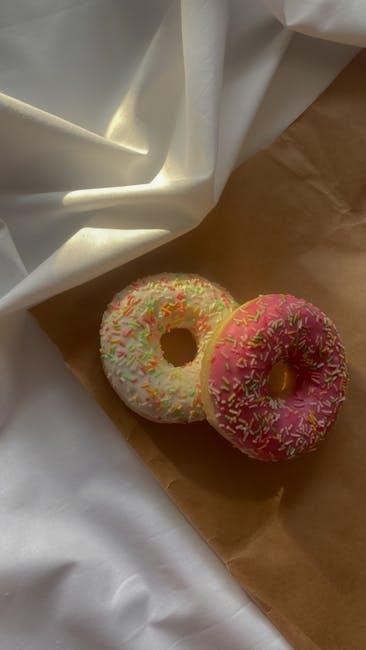
The classic sugar glaze serves as the cornerstone of many baking endeavors, offering a reliable and versatile finish. This foundational glaze is characterized by its simplicity – typically a straightforward combination of powdered sugar and liquid, such as milk or water. It sets to a soft-firmness, preventing smudging when stacking treats, making it ideal for everyday use.
Its opaque finish provides a clean, polished look, perfect for coating cookies or drizzling over pastries. This glaze is exceptionally easy to prepare, requiring minimal ingredients and effort. It’s a fantastic starting point for beginners and a dependable choice for experienced bakers alike.
Furthermore, the classic sugar glaze acts as an excellent base for further decoration, readily accepting sprinkles, edible markers, or more intricate designs. Mastering this basic glaze unlocks a world of creative possibilities in your baking.
Extra-Firm Glaze for Detailed Work
For bakers seeking a robust glaze capable of supporting intricate designs, an extra-firm formulation is essential. This type of glaze dries to a hard, shiny shell, providing a stable surface for detailed coating and decoration. It’s particularly well-suited for cookies intended for elaborate work with food-safe pens, markers, or a generous application of sprinkles.
The key to achieving this firmness lies in a higher ratio of powdered sugar to liquid. This creates a thicker consistency that sets more rigidly. While slightly more challenging to work with than softer glazes, the resulting durability is invaluable for projects demanding precision and longevity.
This glaze transforms simple rollout cookies into beautiful canvases, allowing for complex patterns and vibrant colors. It’s the go-to choice when a truly polished and professional finish is desired, ensuring your creations remain pristine.
Softer-Set Glaze: Reduced Sugar Options
Many bakers prefer a glaze that offers a delicate sweetness and a softer bite, avoiding the intense sugar rush of traditional recipes. Fortunately, achieving a beautifully finished, yet less sugary, glaze is entirely possible. These reduced-sugar options maintain a pleasing translucence, offering a different aesthetic appeal compared to opaque, classic finishes.
The secret lies in carefully adjusting the sugar content while maintaining the correct consistency. This often involves experimenting with slightly increased liquid ratios or incorporating alternative sweeteners. The result is a glaze that sets to a soft-firmness, providing a gentle sweetness without overwhelming the palate.
This approach is ideal for those seeking a more subtle flavor profile or catering to dietary preferences. It’s a versatile option for topping scones, muffins, and cakes, delivering a delightful finish without excessive sweetness.
Translucent Glaze Finishes
For a delicate and understated elegance, consider a translucent glaze finish. Unlike opaque glazes that completely cover the surface, translucent glazes allow some of the underlying color and texture to peek through, creating a sophisticated and visually appealing effect. This style is particularly well-suited for showcasing the natural beauty of baked goods.
Achieving translucency often involves using a higher liquid-to-sugar ratio or employing specific sugar types. The reduced sugar options discussed previously naturally lend themselves to a more translucent appearance. The key is to avoid overmixing, which can introduce air bubbles and diminish the clarity.
These glazes are fantastic for highlighting the details of pastries and cakes, offering a subtle sheen that enhances their overall presentation. They provide a lighter sweetness and a more refined aesthetic, perfect for delicate treats.
Mirror Glaze: Achieving a Spectacular Shine
Mirror glaze is arguably the most visually striking way to finish a cake, delivering an incredibly smooth and brilliantly shiny surface that makes your creations truly sparkle. This technique transforms a simple layer cake into a show-stopping centerpiece, guaranteed to impress.
The secret to a perfect mirror glaze lies in precise execution. It requires careful attention to both timing and temperature; deviations can result in a glaze that’s too thick, too thin, or doesn’t set properly. Following a reliable recipe exactly is paramount for success.
Beyond the technical aspects, mirror glaze offers exciting possibilities for flavor variations, particularly with berries. You can create stunning shades and complementary tastes to elevate your cake’s overall appeal. Mastering this glaze unlocks a new level of cake decorating artistry.
Mirror Glaze Flavor Variations (Berry Focus)
Mirror glaze truly shines when infused with berry flavors, offering a delightful complement to various cake combinations. Imagine a vibrant raspberry glaze cascading over a white chocolate cake, or a deep blueberry glaze adorning a lemon sponge. The possibilities are endless!
Strawberry provides a classic sweetness, while raspberry offers a slightly tart and sophisticated profile. For a bolder flavor, consider blackberry or a mixed berry blend. These fruit purees not only impart delicious taste but also contribute to stunning natural coloring, eliminating the need for artificial dyes.
Experimenting with different berry concentrations allows you to control the intensity of the flavor and color. Remember to adjust the sugar content accordingly to maintain the glaze’s perfect consistency. A berry-infused mirror glaze elevates your cake from beautiful to breathtaking.
Critical Timing and Temperature for Mirror Glaze
Achieving a flawless mirror glaze finish hinges on precise timing and temperature control. The glaze must be applied when it reaches a specific temperature, typically between 86-91°F (30-33°C). Too hot, and it will be too runny, losing its reflective quality; too cold, and it will be too thick, resulting in an uneven coating.
The cake itself should also be thoroughly chilled, ideally frozen for at least a couple of hours, to create a temperature difference that encourages a smooth glaze application. Pouring the glaze onto a warm cake will cause it to melt and drip excessively.
Work quickly and efficiently, as the glaze will begin to set as it cools. Following the recipe exactly and using a reliable thermometer are crucial for success. Don’t rush this step – patience is key to unlocking that spectacular shine!
Powdered Sugar vs. Granulated Sugar in Glaze
The choice between powdered sugar and granulated sugar significantly impacts your glaze’s texture and appearance. Powdered sugar, containing cornstarch, dissolves more readily, creating a smoother, opaque finish – ideal for classic icings and detailed work. Granulated sugar, however, can be used directly, especially for a simple, slightly textured glaze on warm baked goods.
While granulated sugar can be processed into powdered sugar using a food processor, be aware that homemade versions tend to clump faster. This method bypasses the distinct “powdered sugar” taste some dislike, but requires immediate use.
For a truly thick, shell-like coating, especially for cookies intended for intricate decoration, powdered sugar is generally preferred. However, for a quick glaze on scones or muffins, granulated sugar offers a convenient alternative.
Making Powdered Sugar from Granulated Sugar
Creating powdered sugar from granulated sugar is a viable option when you’re in a pinch, offering a way to avoid the distinct taste of commercially produced powdered sugar. The process involves finely grinding granulated sugar using a food processor. Pulse the sugar in short bursts, ensuring it doesn’t overheat, as this can cause clumping.
However, it’s crucial to understand that homemade powdered sugar lacks the anti-caking agents found in store-bought varieties. Consequently, it tends to clump much more quickly, demanding immediate use in your glaze recipe.
While convenient, be prepared for a slightly different texture. The homemade version might not dissolve quite as seamlessly as its commercial counterpart. Despite this, it’s a perfectly acceptable substitute for most glazing applications, especially if used promptly.
Using Granulated Sugar Directly for Glazing
While powdered sugar is traditionally favored for glazes, granulated sugar can be utilized directly, though the technique differs significantly. Instead of dissolving it into a liquid, consider a simple sugar coating applied before baking. This creates a delightful, slightly crunchy, and sparkling finish on scones, muffins, or even cookies.
Simply brush the baked goods with a light coating of cream or milk, then generously sprinkle with granulated sugar. The residual moisture will allow the sugar to adhere, providing a beautiful textural contrast.
However, this method doesn’t yield the smooth, opaque finish of a traditional powdered sugar glaze. It’s best suited when a thick, icing-shell coat isn’t essential, or for customers who prefer a less intensely sweet topping. It’s a quick and easy alternative, especially when time is of the essence!
Glaze for Cookie Coating & Decoration
A properly prepared glaze serves as an excellent base for transforming simple cookies into edible works of art. This particular glaze formulation dries to a hard, shiny finish, creating the perfect canvas for detailed decoration. It’s ideal for coating cookies like chocolate cut-outs, elevating them from basic to beautiful with minimal effort.
The smooth, firm surface provided by the glaze allows for precise application of food-safe pens and markers, enabling intricate designs and personalized messages. Furthermore, it acts as a superb adhesive for sprinkles, edible glitter, and other decorative elements, ensuring they stay securely in place.
This method ensures vibrant colors and textures adhere flawlessly, resulting in professional-looking cookies. It’s a fantastic way to unleash creativity and add a special touch to any occasion!
Preparing Cookies for Glaze Application
Before applying any glaze, proper cookie preparation is crucial for achieving a flawless finish. Ensure your cookies are completely cooled to room temperature; warm cookies will cause the glaze to melt and run, resulting in an uneven and messy appearance. A flat, even surface is also essential – any bumps or imperfections will be highlighted by the coating.
For optimal glaze adhesion, consider lightly dusting the cookies with powdered sugar. This creates a slightly textured surface that helps the glaze grip. Remove any loose crumbs with a soft brush to prevent them from marring the smooth finish.

If you intend to decorate with sprinkles or markers after glazing, apply the glaze while the cookie is still slightly tacky. This will ensure the decorations adhere properly. A well-prepared cookie is the foundation for a beautifully glazed masterpiece!
Glaze as a Base for Sprinkles & Markers
A smooth glaze layer transforms simple cookies into canvases for creativity! This glaze dries hard and shiny, providing the perfect foundation for adding delightful details with sprinkles or food-safe markers. It’s an excellent way to elevate rollout cookies, like chocolate cut-outs, from basic to beautifully decorated.
When applying sprinkles, work quickly after glazing, while the coating is still wet. The glaze acts like an adhesive, ensuring the sprinkles stay firmly in place. For intricate designs using food-safe markers, allow the glaze to set completely – this prevents smudging and allows for clean, precise lines.
This technique is ideal for themed cookies, personalized gifts, or simply adding a touch of fun. The glaze not only enhances the visual appeal but also protects the cookie surface for detailed artistry!
Vanilla Glaze: A Quick & Easy Recipe
This Vanilla Glaze is a remarkably simple solution for adding a touch of sweetness and shine to your baked goods. Requiring only three ingredients and a few minutes of whisking, it’s perfect for when you need a quick and impressive finish. The result is a smooth, thick, and glossy glaze that beautifully coats scones, muffins, and cookies.
Its ease of preparation doesn’t compromise on quality; this glaze delivers a classic vanilla flavor that complements a wide range of treats. It’s an ideal base for further decoration, such as sprinkles, or for creating elegant designs with edible markers.
The simplicity of this recipe makes it a go-to for both beginner and experienced bakers alike. Enjoy the convenience and deliciousness of this quick vanilla glaze!
Three-Ingredient Vanilla Glaze Technique
Creating this delightful vanilla glaze is incredibly straightforward, requiring just three key ingredients: powdered sugar, a liquid (milk or cream are excellent choices), and pure vanilla extract; Begin by sifting the powdered sugar to eliminate any lumps, ensuring a perfectly smooth final product.
Gradually add the liquid, starting with a small amount, and whisk continuously. This prevents a powdery mess and allows you to control the glaze’s consistency. Add vanilla extract to taste, enhancing the flavor profile. Continue whisking until the glaze reaches a desired thickness – it should be pourable but not too runny.
The key to success lies in the gradual addition of liquid and consistent whisking. This simple technique yields a glossy, flavorful glaze ready to elevate your baked creations!
Achieving Glossy Vanilla Glaze Consistency
The secret to a truly stunning, glossy vanilla glaze lies in mastering its consistency. It needs to be thick enough to coat beautifully, yet fluid enough to create a smooth, even finish. Start with a ratio of approximately 1 cup of powdered sugar to 2-3 tablespoons of liquid – milk or cream work wonderfully.
Whisk vigorously! Proper aeration is crucial for that desirable sheen. If the glaze appears too thick, add liquid, one teaspoon at a time, until the desired flow is achieved. Conversely, if it’s too thin, incorporate more powdered sugar, a tablespoon at a time.
A perfect glaze should slowly drip from your spoon, forming a ribbon that briefly holds its shape. This ensures optimal coverage and a professional, polished look on your baked goods. Remember, patience and gradual adjustments are key!
Glaze Consistency: Finding the Right Flow
Determining the ideal glaze consistency is paramount for successful application. Too thick, and it will appear clumpy and uneven; too thin, and it will run right off your treats! The “ribbon test” is your best friend here. Lift your whisk or spoon, and observe how the glaze falls.
A properly-textured glaze will create a ribbon that briefly holds its shape on the surface before slowly melding back in. This indicates sufficient thickness for a beautiful, even coat. If the ribbon disappears instantly, add powdered sugar, one tablespoon at a time, whisking thoroughly after each addition.
Conversely, if the ribbon is stiff and doesn’t flow, incorporate liquid – milk, cream, or even a touch of lemon juice – a teaspoon at a time. Achieving the right flow ensures a professional finish and prevents frustrating runs or cracks.
Adjusting Glaze Thickness (Adding Liquid)
When your glaze is too thick, hindering a smooth, even coat, incremental additions of liquid are key. Avoid a drastic change; start with just a teaspoon of your chosen liquid – milk, cream, water, or even lemon juice will work, subtly influencing the flavor profile too!
Whisk vigorously after each addition, ensuring complete incorporation before assessing the consistency. Patience is crucial! Adding too much liquid at once can quickly lead to a glaze that’s too thin, requiring correction with more powdered sugar.
Observe the “ribbon test” after each teaspoon. You’re aiming for a consistency where the glaze gently flows, creating a temporary ribbon on the surface before blending back in. Remember, small adjustments yield the best results, preventing wasted ingredients and ensuring a perfectly glazed finish.
Preventing Glaze from Running or Cracking
To avoid a runny glaze, ensure your base is adequately thick before application. A common culprit is excessive liquid; remember to add it incrementally, whisking thoroughly after each addition. Cooler temperatures also help – a warmer environment can cause the glaze to become too fluid.
Cracking, conversely, often stems from a glaze that’s too thick or dries too quickly. Again, liquid adjustments are vital. Applying the glaze in a thinner, even layer minimizes stress as it sets. Avoid direct airflow, like a fan, which accelerates drying and increases the risk of cracking.
Proper cookie preparation is also key; ensure cookies are completely cooled before glazing. A slightly textured surface can provide better adhesion, reducing the likelihood of the glaze sliding off. Patience and a controlled environment are your allies!
Glaze Application Techniques
Successful glaze application hinges on even distribution. For scones, muffins, and cakes, a simple pour-and-spread method works well, using an offset spatula to ensure complete coverage. With cookies, a spoon or piping bag offers greater control, especially for detailed designs.
When coating cookies, start with a generous dollop and gently spread outwards, working quickly to maintain a smooth surface. For a flawless finish, consider “flooding” – applying a thicker glaze layer that self-levels. This is ideal for creating a base for sprinkles or edible markers.

Remember to work efficiently, as the glaze will begin to set. If bubbles appear, gently tap the surface or use a toothpick to pop them; Practice makes perfect – experiment with different tools and techniques to find what works best for you!
Glazing Scones, Muffins, and Cakes
Glazing warm scones, muffins, and cakes allows for optimal absorption, creating a delightful, slightly sticky finish. For a simple application, gently pour the glaze over the warm baked good, allowing it to cascade down the sides. Use an offset spatula to evenly distribute any excess, ensuring complete coverage.
With cakes, consider the texture – a thinner glaze works best for delicate crumb structures, while a slightly thicker consistency suits denser cakes. For a more polished look, chill the glazed cake briefly to set the glaze before serving.
Don’t be afraid to experiment with drizzling techniques for a rustic aesthetic. Remember, the goal is a beautiful, even coat that enhances both the flavor and appearance of your baked creations!
Glazing Cookies: Even Coating Tips
Achieving an even glaze coat on cookies requires a bit of finesse. Begin with completely cooled cookies – warm surfaces cause the glaze to run, resulting in an uneven finish. For a smooth, consistent layer, use a small offset spatula or the back of a spoon to spread the glaze evenly across the surface.
If you’re preparing cookies for decoration with sprinkles or markers, ensure the glaze is fully set before adding embellishments. This prevents smudging and ensures a clean, professional look. A hard, shiny glaze provides the perfect canvas for intricate designs.
For a flawless finish, work quickly and efficiently, as the glaze will begin to set. Consider using a turntable for easy rotation and access to all sides of the cookie!
Glaze Storage and Shelf Life
Proper storage is key to maintaining glaze quality. Leftover glaze should be stored in an airtight container at room temperature. While it doesn’t necessarily expire, its consistency will change over time. Expect some thickening to occur, especially with sugar-based glazes.
If your glaze becomes too thick, you can often reactivate it by adding a very small amount of liquid – water, milk, or lemon juice, depending on the glaze type – and stirring vigorously. Add liquid a drop at a time to avoid over-thinning.
Generally, a classic sugar glaze will remain usable for up to a week when stored correctly. However, always check for any signs of spoilage, such as an off odor or mold, before using. Discard if any concerns arise.
Storing Leftover Glaze
When you have leftover glaze, proper storage is crucial to prevent it from becoming unusable. The best method is to transfer any remaining glaze to an airtight container. This minimizes exposure to air, which can cause it to dry out and form a crust.
Room temperature is generally suitable for storing most glazes for a few days. However, if your kitchen is particularly warm, or the glaze contains fresh ingredients like fruit juice, refrigeration is recommended. This extends its shelf life to approximately one week.
Be aware that sugar glazes tend to thicken as they sit. Don’t discard it immediately! Often, a little liquid and vigorous stirring can restore the desired consistency. Always inspect for any changes in smell or appearance before reusing.
Reactivating Glaze if it Thickens
It’s incredibly common for glaze to thicken over time, especially after being stored, or even just sitting for a while. Don’t immediately assume it’s unusable! Reactivating it is often a simple process, saving you time and ingredients.
The key is to gradually add liquid – usually water or milk – one teaspoon at a time. After each addition, stir vigorously. A whisk works best for incorporating the liquid smoothly and preventing lumps. Continue this process until you achieve the desired consistency.
Avoid adding too much liquid at once, as this can make the glaze too thin. Patience is key! If the glaze has become very thick and grainy, a brief warming in the microwave (a few seconds at a time) can help dissolve the sugar crystals before stirring in the liquid.