Wilton Bunny Cake Pan Instructions: A Comprehensive Guide
Unleash your inner baker! This guide provides detailed instructions for crafting adorable bunny cakes using your Wilton pan‚ ensuring delightful results every time.
Understanding the Wilton Bunny Cake Pan
The Wilton Bunny Cake Pan is a popular choice for creating charming cakes‚ especially around Easter. Its unique‚ three-dimensional design molds cake batter into a delightful bunny shape‚ offering a fun alternative to traditional cake pans. This pan isn’t just for holidays; it’s perfect for birthdays or any occasion where a touch of whimsy is desired.
Understanding the pan’s construction is key to success. It typically features detailed sculpting to define the bunny’s features – ears‚ face‚ and body. The metal used is generally a heavy-gauge aluminum‚ designed for even heat distribution. Familiarizing yourself with these features before you begin will greatly improve your baking experience and the final appearance of your bunny cake.
Pan Materials and Construction
Wilton Bunny Cake Pans are predominantly crafted from cast aluminum‚ chosen for its excellent heat conductivity. This ensures even baking‚ minimizing hot spots that could lead to unevenly cooked cake. The aluminum is typically coated with a non-stick finish‚ though the quality of this coating can vary.
The pan’s design incorporates intricate details – the bunny’s face‚ ears‚ and body contours – achieved through precise molding. These details are crucial for the final cake shape. Inspect the pan for any imperfections in the casting or coating before first use. Some pans may have slight variations due to the manufacturing process‚ but significant flaws should be addressed before baking.
Initial Preparation: Seasoning the Pan
Seasoning your Wilton Bunny Pan enhances its non-stick properties and prolongs its lifespan. Begin by thoroughly washing the pan with warm‚ soapy water and drying it completely. Then‚ lightly coat the entire interior surface – including all the intricate details – with shortening. Use a pastry brush or paper towel to ensure even coverage.
Next‚ dust the shortening-coated pan with flour‚ tapping out any excess. This creates a foundational layer for easy cake release. Repeat the shortening and flour process one more time. Baking the pan empty at 350°F (175°C) for 10-15 minutes further sets the seasoning. Allow to cool completely before first use.
Recipe Selection: Best Cake Recipes for Bunny Pans
Choosing the right recipe is crucial for a successful bunny cake! Dense‚ yet moist‚ cake batters work best‚ as they hold their shape during baking and release cleanly. Classic vanilla‚ chocolate‚ or even red velvet recipes are excellent choices. Avoid very light and airy sponge cakes‚ as they may crumble.
Recipes calling for oil instead of butter often yield a moister result‚ aiding in release. Boxed cake mixes are perfectly acceptable and convenient! Ensure the batter isn’t overly thick; a slightly looser consistency fills the details better. Consider adding a tablespoon or two of sour cream for extra tenderness.
Baking with the Wilton Bunny Pan: Step-by-Step
Begin by preheating your oven to 350°F (175°C). Grease the bunny pan thoroughly with baking spray containing flour‚ ensuring every nook and cranny is coated – this is vital for easy release. Gently pour your prepared cake batter into the pan‚ filling each section about two-thirds full.
Avoid overfilling‚ as the cake will rise. Use a spatula to evenly distribute the batter. Bake for approximately 30-35 minutes‚ or until a toothpick inserted into the center comes out clean. Monitor closely‚ as baking times can vary.
Cake Batter Preparation
Start with your favorite cake recipe! Whether it’s vanilla‚ chocolate‚ or carrot cake‚ ensure the batter is smooth and of a medium consistency. Avoid overly thick or thin batters‚ as they may not define the bunny shape well.
Properly cream together butter and sugar for a light and fluffy texture. Gently fold in dry ingredients‚ being careful not to overmix – this develops gluten and can result in a tough cake. A slightly looser batter tends to fill the details of the pan more effectively‚ yielding a more defined bunny shape.
Filling the Bunny Pan
Grease and flour the pan thoroughly! This is crucial for easy release. Use shortening or baking spray with flour‚ ensuring every nook and cranny is coated. Gently pour the cake batter into the prepared bunny pan‚ filling each section approximately two-thirds full.
Avoid overfilling‚ as the cake will rise during baking. Use a spatula to evenly distribute the batter‚ ensuring it reaches all the detailed areas of the bunny shape. A small offset spatula works best for this. Lightly tap the pan on the counter to release any trapped air bubbles for a more even bake.
Baking Time and Temperature
Preheat your oven to 350°F (175°C)! This consistent temperature is vital for even baking. Place the filled bunny pan on a baking sheet for stability and easier handling. Bake for approximately 30-35 minutes‚ but always check for doneness.
Insert a wooden skewer or toothpick into the center of the cake; if it comes out clean‚ the cake is ready. Baking times can vary depending on your oven‚ so start checking at 30 minutes. Avoid opening the oven door frequently during baking‚ as this can cause the cake to sink.
Cooling and Releasing the Cake
Allow the cake to cool in the pan for 10-15 minutes after removing it from the oven. This prevents cracking and makes release easier. Gently invert the pan onto a wire rack. If the cake doesn’t release immediately‚ tap the pan firmly but carefully.
Avoid using sharp objects to pry the cake loose‚ as this can damage its delicate shape. A light coating of baking spray beforehand is crucial. Once fully cooled‚ your adorable bunny cake is ready for frosting and decorating!
Cooling Process – Preventing Cracking
Sudden temperature changes are the enemy of a perfect bunny cake! To minimize cracking‚ let the cake cool in the pan for a specified time – typically 10-15 minutes – on a wire rack. Avoid placing a hot pan directly onto a cold surface.
A gradual cooling process is key; You can also gently wrap the warm pan with a clean kitchen towel to further insulate it. Resist the urge to rush; patience yields a beautifully intact bunny. Proper cooling ensures structural integrity for decorating!
Releasing the Cake from the Pan
Gentle persuasion is crucial! After the cooling period‚ carefully invert the pan onto a wire rack. If the cake doesn’t release immediately‚ gently tap the pan’s bottom and sides. Avoid forceful banging‚ which can damage the delicate bunny shape.
A light coating of baking spray with flour beforehand is your best friend. For stubborn areas‚ use a thin‚ flexible spatula to carefully loosen the edges. Patience is key – don’t force it! A perfectly released bunny is a happy bunny‚ ready for frosting and delightful decoration.
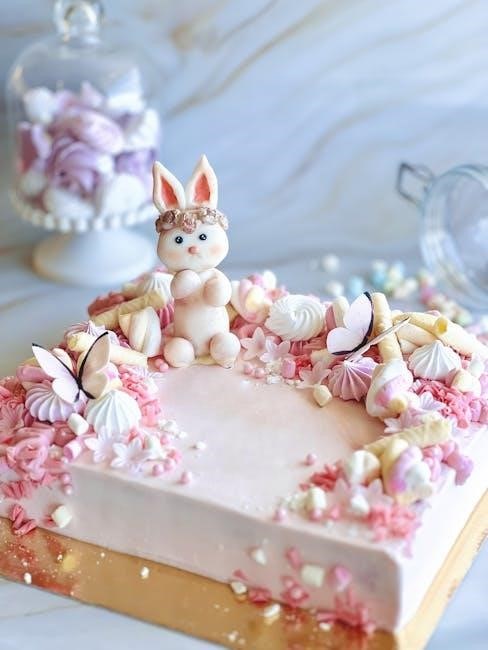
Frosting and Decorating Your Bunny Cake
Bring your bunny to life! Once cooled‚ your cake is a blank canvas for creativity. Start with a crumb coat – a thin layer of frosting to trap loose crumbs – and chill for 15-20 minutes. This prevents crumbs from mixing into your final frosting layer.
Buttercream is a popular choice‚ offering stability and ease of coloring. Consider pastel shades for a classic bunny look. Utilize piping bags and tips for detailed features like eyes‚ nose‚ and whiskers. Don’t be afraid to experiment with textures to mimic fur – a small offset spatula works wonders!
Choosing the Right Frosting
Selecting the perfect frosting is key! Buttercream‚ known for its smooth texture and versatility‚ is a fantastic choice for bunny cakes‚ allowing for detailed decorations. Cream cheese frosting offers a tangy complement to the cake‚ but is softer and requires chilling.
Fondant provides a polished‚ sculpted look‚ ideal for a more refined bunny. Consider the complexity of your desired design; simpler designs work well with buttercream‚ while intricate details benefit from fondant’s malleability. Stability is crucial – ensure your frosting holds its shape‚ especially for fur effects.
Basic Frosting Techniques
Mastering foundational skills is essential! Begin with a crumb coat – a thin layer sealing in loose crumbs – chilled for 30 minutes. Apply frosting smoothly using an offset spatula‚ rotating the cake for even coverage. Practice piping basic shapes like stars and shells using different tips.
For a seamless finish‚ warm the spatula slightly. Utilize the “swirl and smooth” method‚ creating gentle swirls then leveling with the spatula. Don’t overload the spatula; less is more! Consistent pressure yields professional results. Remember to keep your frosting at a spreadable consistency – not too soft‚ not too firm.
Advanced Decoration Ideas: Fur Effect
Elevate your bunny cake with a realistic fur texture! Utilize a grass piping tip (Wilton #233 is popular) and short‚ quick strokes of buttercream frosting. Vary the pressure and angle for a natural‚ uneven look. Start at the bottom and work upwards‚ overlapping strokes slightly.
For a softer effect‚ lightly drag a clean‚ dry brush across the piped fur. Consider using multiple shades of frosting – creams‚ whites‚ and light browns – to add depth and dimension. Practice on parchment paper first to perfect your technique. A turntable simplifies the process‚ allowing for even coverage and a truly fluffy finish!
Troubleshooting Common Issues
Encountering problems? Don’t worry‚ it’s common! If your cake sticks‚ ensure thorough greasing and flouring‚ or use baking spray with flour. For uneven baking‚ rotate the pan halfway through and verify oven temperature accuracy. A cracked cake often results from too high a temperature or overbaking – reduce heat and check for doneness earlier.
If details are lost during baking‚ chilling the batter briefly can help. Remember‚ even with careful preparation‚ slight imperfections add character! Don’t be afraid to embrace them and focus on the overall adorable result. Experimentation is key to mastering the Wilton bunny pan.
Cake Sticking to the Pan
A common frustration! Cake sticking to the Wilton bunny pan can be easily avoided with proper preparation. Begin by generously greasing every nook and cranny of the pan with shortening or baking spray. Following greasing‚ dust the entire interior with flour‚ ensuring complete coverage – tap out any excess.
For extra insurance‚ consider using a baking spray that already contains flour. Allow the greased and floured pan to chill briefly before adding batter. If sticking still occurs‚ a short cooling period in the pan before inverting can help release the cake gently. Patience is key!
Uneven Baking
Achieving a uniformly baked bunny! Uneven baking in the Wilton bunny pan often stems from inconsistent heat distribution. Ensure your oven is accurately calibrated using an oven thermometer. Rotate the pan halfway through the baking time to promote even browning.
Avoid opening the oven door frequently‚ as this causes temperature fluctuations. If the bunny’s ears or feet seem to be browning too quickly‚ gently tent them with aluminum foil. Using a quality cake recipe specifically suited for shaped pans also helps‚ as these recipes account for varying thicknesses.
Cracked Cake
Preventing unsightly cracks in your bunny! A cracked cake often results from temperature shock or an overly dry batter. Ensure all ingredients are at room temperature before mixing. Avoid overmixing the batter‚ as this develops gluten and can lead to a tougher‚ more prone-to-cracking cake.
When cooling‚ allow the cake to sit in the pan for the recommended time before inverting. A gradual cooling process is key; avoid placing a hot pan directly onto a cold surface. If cracks appear‚ don’t despair! Frosting skillfully conceals minor imperfections‚ transforming flaws into charming details.
Cleaning and Storing the Bunny Pan
Maintaining your pan for years of baking! After each use‚ hand wash the bunny cake pan with warm‚ soapy water. Avoid abrasive cleaners or scouring pads‚ as these can damage the non-stick coating. Ensure the pan is thoroughly dried before storing to prevent rust.
For stubborn residue‚ a paste of baking soda and water can gently lift baked-on bits. Store the pan in a dry place‚ ideally wrapped in a cloth or hung to prevent scratches. Proper care extends the life of your pan‚ guaranteeing many adorable bunny cakes to come!
Proper Cleaning Procedures
Gentle cleaning preserves the pan’s quality! Begin by removing any excess cake crumbs. Hand washing is strongly recommended; avoid dishwashers as harsh detergents can degrade the non-stick surface. Use warm water and mild dish soap‚ employing a soft sponge or cloth.
Pay special attention to the intricate details of the bunny shape. For baked-on residue‚ soak the pan in warm‚ soapy water for 15-20 minutes before gently scrubbing. Rinse thoroughly and dry completely with a soft towel. Never use abrasive cleaners‚ steel wool‚ or scouring pads – these will ruin the coating!
Long-Term Storage Tips
Protect your investment for years of baking! After thorough cleaning and drying‚ store your Wilton bunny cake pan in a cool‚ dry place. Avoid stacking other heavy items on top‚ as this could potentially warp the shape.
Consider wrapping the pan in soft cloth or bubble wrap to prevent scratches during storage. If you have the original packaging‚ that’s ideal! Storing it with other cake pans is fine‚ but ensure they aren’t pressing directly against the bunny’s delicate features. Proper storage maintains the pan’s integrity and ensures delightful bunny cakes for years to come.
Finding Replacement Parts
Don’t discard a perfectly good pan due to a minor issue! While the Wilton Bunny Cake Pan is durable‚ parts can occasionally wear or get lost. Wilton’s official website is the first place to check for replacement components‚ like handles or specific pan sections.
However‚ availability can vary. Explore online marketplaces like eBay and Amazon‚ where individuals and retailers often sell spare parts. Baking supply stores‚ both local and online‚ may also carry replacements. When searching‚ have your pan’s model number handy to ensure compatibility. A little effort can restore your bunny pan to its former glory!
Where to Buy Wilton Bunny Cake Pans
Ready to hop into bunny cake baking? Finding a Wilton Bunny Cake Pan is usually quite easy! Major online retailers like Amazon‚ Walmart‚ and Target consistently stock them‚ offering convenient shipping options. Wilton’s official website is another excellent source‚ often featuring exclusive deals and bundles.
For those who prefer in-person shopping‚ check local craft stores like Michaels and Joann Fabrics. Many well-stocked baking supply stores also carry Wilton products. Don’t forget to compare prices across different retailers to snag the best deal – happy baking!
Online Retailers
Shopping online offers fantastic convenience! Amazon is a reliable source‚ frequently showcasing competitive pricing and customer reviews for the Wilton Bunny Cake Pan. Walmart.com and Target.com are also excellent options‚ often providing fast shipping and potential in-store pickup.
Directly visiting Wilton’s official website (www.wilton.com) guarantees authenticity and access to their full range of baking supplies. Be sure to check for promotional codes and sales events to maximize your savings. Comparing prices across these platforms ensures you secure the best possible deal for your bunny baking adventures!
Local Craft and Baking Stores
Support your community and enjoy personalized service! Michael’s and Joann Fabric and Craft Stores frequently stock Wilton cake pans‚ including the popular bunny design. These stores often host baking classes and workshops‚ providing valuable tips and inspiration.
Specialty baking supply stores are another excellent resource‚ offering a wider selection of decorating tools and expert advice. Don’t forget to check local grocery stores with well-stocked baking aisles; some carry Wilton products seasonally. Visiting these stores allows you to physically inspect the pan before purchasing and connect with fellow baking enthusiasts!