
BXX10231 Installation Instructions on a 2025R: A Comprehensive Guide
This guide details the installation of the BXX10231 lift arm on a John Deere 2025R tractor. Online retailers like AGR24.ru and zapchasti-catalog.ru offer this component‚ ensuring availability and delivery across Russia.
The BXX10231 lift arm is a crucial component for John Deere 2025R tractors‚ specifically designed to enhance lifting capacity and operational efficiency. Often referred to as a “3R Lift System Row” arm‚ it’s a direct replacement or upgrade for existing lift mechanisms. Sourced from suppliers like AGR24.ru and zapchasti-catalog.ru‚ the BXX10231 is readily available for purchase and delivery.
This lift arm is part of the John Deere 1 Series Lift Kit‚ offering improved performance for various agricultural tasks. It’s compatible with a range of implements‚ allowing for greater versatility in field operations. The robust construction of the BXX10231 ensures durability and longevity‚ even under demanding conditions.
Understanding the function and benefits of the BXX10231 is essential before commencing installation. It’s designed to provide a stronger and more reliable lifting solution compared to standard arms. Proper installation‚ as detailed in this guide‚ will maximize its performance and ensure safe operation of your 2025R tractor. Images available online showcase the arm’s design and construction‚ aiding in identification and familiarization.
Safety Precautions Before Installation
Prior to installing the BXX10231 lift arm on your John Deere 2025R‚ strict adherence to safety protocols is paramount. Always disconnect the tractor’s battery to prevent accidental electrical activation during the process. Ensure the tractor is parked on a level surface and the parking brake is firmly engaged.
Hydraulic System Safety: Relieve all pressure from the hydraulic system before disconnecting any hydraulic lines. Hydraulic fluid under pressure can cause serious injury. Wear appropriate personal protective equipment (PPE)‚ including safety glasses‚ gloves‚ and sturdy footwear.
Support the Tractor: If the installation requires lifting any part of the tractor‚ utilize appropriate jack stands or support structures. Never work under a tractor supported only by a jack. Be mindful of pinch points and moving parts.
Read the Manual: Thoroughly review the John Deere 2025R operator’s manual and these specific BXX10231 installation instructions before beginning. If you are uncomfortable with any aspect of the installation‚ consult a qualified mechanic. Safe installation ensures both your well-being and the proper functioning of the lift arm.
Tools Required for Installation
Successfully installing the BXX10231 lift arm on your John Deere 2025R necessitates a specific set of tools. A comprehensive socket set‚ including metric sizes‚ is essential for removing and installing fasteners. A torque wrench is crucial for tightening bolts to the manufacturer’s specifications‚ preventing damage or loosening.
Hydraulic Tools: You’ll need a hydraulic hose disconnect tool to safely separate hydraulic lines without damage. A fluid drain pan is vital for catching any spilled hydraulic oil‚ maintaining a clean and safe work environment.
General Tools: A set of open-end wrenches‚ pliers‚ screwdrivers (Phillips and flathead)‚ and a hammer will be frequently used. Penetrating oil will aid in loosening corroded or stubborn bolts. A work light is recommended for improved visibility‚ especially in dimly lit areas.
Optional but Helpful: A magnetic parts tray will keep small components organized‚ and a shop manual specific to the 2025R can provide detailed diagrams and torque values. Having these tools readily available will streamline the installation process and ensure a professional result.

Identifying the Correct Components
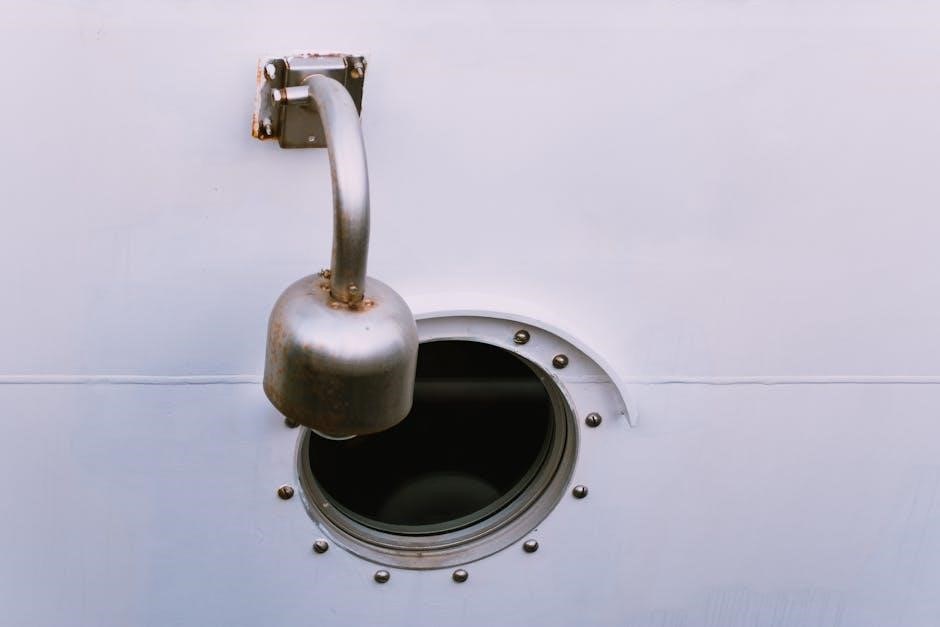
Before commencing the BXX10231 lift arm installation on your John Deere 2025R‚ verifying component correctness is paramount. The BXX10231 itself is the primary component – a lift arm designed for compatibility with the 2025R model. Online suppliers like AGR24.ru and zapchasti-catalog.ru showcase images of the part‚ aiding visual confirmation.
Check for Part Numbers: Ensure the part number (BXX10231) on the received component matches your order and the documentation. Inspect the lift arm for any shipping damage‚ such as bends‚ cracks‚ or missing parts.
Related Components: Verify you have all necessary hardware – bolts‚ nuts‚ washers‚ and hydraulic fittings – often included with the BXX10231 kit. If replacing an existing lift arm‚ compare the new component to the old one to confirm dimensional similarities.
Hydraulic Lines: Identify the correct hydraulic lines that connect to the lift arm. Refer to your 2025R’s operator’s manual for diagrams. Confirm the lines are free from kinks‚ cracks‚ and corrosion. Accurate component identification prevents installation errors and ensures optimal performance.
Removing Existing Lift Arm (If Applicable)

If replacing an existing lift arm on your John Deere 2025R with the BXX10231‚ careful removal is crucial. Begin by safely securing the tractor‚ ensuring it’s on a level surface with the engine off and the parking brake engaged. Disconnect the hydraulic lines connected to the existing lift arm‚ placing rags underneath to catch any fluid spillage.
Fastener Removal: Locate and remove the bolts securing the lift arm to the tractor frame. These may require penetrating oil if corroded. Support the lift arm during bolt removal to prevent it from dropping suddenly.
Careful Disconnection: Once all bolts are removed‚ carefully disconnect the lift arm from any remaining linkages or connections. Note the orientation of the arm and any associated hardware for reassembly reference.
Inspection: Inspect the mounting points on the tractor frame for any damage or wear. Clean the mounting surfaces before installing the new BXX10231 lift arm. Properly disposing of the old lift arm and any used fluids is essential for environmental responsibility.
Preparing the 2025R for BXX10231 Installation
Before installing the BXX10231 lift arm on your John Deere 2025R‚ thorough preparation is key for a smooth and successful installation. Begin by ensuring the tractor is parked on a level surface‚ the engine is off‚ and the parking brake is firmly engaged. Disconnect the negative terminal of the battery to prevent any electrical shorts during the process.
Cleaning and Inspection: Carefully clean the mounting points on the tractor frame where the new lift arm will be attached. Inspect these areas for any signs of rust‚ corrosion‚ or damage. Address any issues before proceeding – wire brushing and applying a rust preventative are recommended.
Hydraulic System Check: Briefly run the tractor to circulate hydraulic fluid‚ then shut it down. This helps to ensure proper lubrication during connection. Have appropriate containers ready to catch any potential hydraulic fluid spillage when disconnecting or connecting lines.
Component Layout: Unpack the BXX10231 lift arm and all associated hardware. Lay out the components in an organized manner to easily identify each part during the installation process. Referencing a parts diagram (see section 13) can be extremely helpful.
Installing the BXX10231 Lift Arm – Step-by-Step
With the 2025R properly prepared‚ begin the BXX10231 lift arm installation. First‚ position the lift arm onto the tractor’s mounting points‚ aligning the holes for the mounting bolts. Ensure the arm sits flush against the frame.
Bolt Installation: Insert the mounting bolts and loosely tighten them by hand. Do not fully tighten at this stage; this allows for adjustments later. Refer to the torque specifications (section 10) for the correct tightening values.
Support and Alignment: Use a jack or support stand to help hold the lift arm in place during the initial stages of installation. This ensures proper alignment and prevents strain on the mounting points. Double-check the alignment with the tractor’s existing geometry.
Progressive Tightening: Once aligned‚ begin tightening the mounting bolts in a criss-cross pattern. This ensures even pressure distribution and prevents warping. Gradually increase the torque until the specified value is reached.
Visual Inspection: After tightening‚ perform a visual inspection to confirm the lift arm is securely mounted and properly aligned. Look for any gaps or misalignments that need addressing.
Connecting Hydraulic Lines
With the BXX10231 lift arm securely mounted‚ proceed to connect the hydraulic lines. This step is crucial for the proper functioning of the lift system. Before connecting‚ ensure the hydraulic system is depressurized to prevent fluid spray and potential injury.
Line Identification: Carefully identify the correct hydraulic lines for connection. Refer to the parts diagram (section 13) to ensure you are connecting the lines to the appropriate ports on the lift arm and the tractor’s hydraulic system. Incorrect connections can damage the system.
Hose Assembly: Attach the hydraulic hoses to the fittings on the lift arm and the tractor. Use new hose clamps to ensure a secure and leak-proof connection. Tighten the clamps firmly‚ but avoid over-tightening‚ which can damage the hoses.
Leak Check: After connecting all the hydraulic lines‚ perform a thorough leak check. Start the tractor and slowly operate the lift arm through its full range of motion. Inspect all connections for any signs of leakage.
Bleeding the System: If air is present in the hydraulic system‚ bleed it according to the John Deere 2025R operator’s manual. This will ensure smooth and efficient operation of the lift arm.
Adjusting Lift Arm Geometry
Proper lift arm geometry is vital for optimal performance and preventing undue stress on the system. After installing the BXX10231 and connecting the hydraulic lines‚ careful adjustment is necessary.
Leveling: Ensure the lift arms are level with each other. Uneven arms can cause implements to operate incorrectly and lead to instability. Use a level to check the horizontal alignment of both arms.
Sway Adjustment: Adjust the sway chains or stabilizers to minimize side-to-side movement of the lift arms. This is particularly important when operating implements on uneven terrain. Refer to the John Deere 2025R operator’s manual for specific adjustment procedures.
Draft Control: If your 2025R is equipped with draft control‚ adjust the sensitivity settings to match the implement being used. Proper draft control ensures consistent working depth and reduces strain on the tractor.

Implement Compatibility: Verify that the lift arm geometry is compatible with the implements you intend to use. Some implements may require specific adjustments to achieve optimal performance. Always consult the implement manufacturer’s recommendations.
Final Check: After making adjustments‚ operate the lift arm through its full range of motion and observe its behavior. Fine-tune the adjustments as needed to achieve smooth‚ stable‚ and efficient operation.
Checking for Proper Operation
Following BXX10231 installation‚ a thorough operational check is crucial to confirm correct functionality and identify potential issues. Begin by visually inspecting all connections – hydraulic lines‚ mounting points‚ and fasteners – ensuring everything is secure and properly tightened according to the torque specifications.
Lift Test: Raise and lower the lift arms through their full range of motion‚ observing for any binding‚ hesitation‚ or unusual noises. The movement should be smooth and consistent.
Hydraulic Leak Check: Carefully inspect all hydraulic connections for leaks. Even small leaks can lead to reduced performance and environmental concerns. Address any leaks immediately by tightening fittings or replacing damaged components.

Implement Test: Attach a known‚ compatible implement to the lift arms and test its operation. Verify that the implement is lifted and lowered correctly‚ and that the lift arms maintain a stable position under load.
Control Responsiveness: Assess the responsiveness of the lift arm controls. The arms should react quickly and accurately to input from the operator.
Safety Systems: Confirm that any safety systems related to the lift arms‚ such as overload protection‚ are functioning correctly. Prioritize safety during all testing procedures.
Torque Specifications for Fasteners
Proper fastener torque is paramount for the safe and reliable operation of the BXX10231 lift arm on your 2025R. Under-torquing can lead to loosening and potential failure‚ while over-torquing can damage the fasteners or the components they secure.
Mounting Bolts (Lift Arm to Tractor): These critical bolts require a torque of 85-95 Nm (63-70 ft-lbs). Use a calibrated torque wrench to ensure accuracy.
Hydraulic Line Fittings: Tighten hydraulic line fittings to 30-35 Nm (22-26 ft-lbs). Avoid excessive force‚ as this can damage the fittings or hoses.
Pivot Pin Fasteners: Secure pivot pin fasteners with a torque of 50-60 Nm (37-44 ft-lbs). Regularly inspect these fasteners for any signs of loosening.
Lock Nuts & Washers: Always use the specified lock nuts and washers‚ and ensure they are properly seated before tightening. Re-torque all fasteners after the first 50 hours of operation.
Important Note: These torque specifications are guidelines. Refer to the John Deere 2025R operator’s manual or a qualified technician for the most accurate and up-to-date information specific to your machine. Consistent adherence to these specifications will maximize the lifespan and performance of the BXX10231 lift arm.
Lubrication Points and Maintenance
Regular lubrication is crucial for maintaining the smooth operation and longevity of your BXX10231 lift arm installed on the 2025R. Neglecting lubrication can lead to increased wear‚ reduced efficiency‚ and potential component failure.
Pivot Points: Grease all pivot points – including the main lift arm pivot and any secondary articulation points – every 25 hours of operation‚ or more frequently in dusty or demanding conditions. Use a high-quality lithium-based grease.
Hydraulic Cylinder Rods: Inspect hydraulic cylinder rods for any signs of damage or leakage. Wipe clean and apply a light coat of protective oil to prevent corrosion.

Fastener Inspection: Periodically (every 50 hours) inspect all mounting bolts and fasteners for tightness. Re-torque as needed‚ following the specifications outlined in the torque specification section.
Visual Inspection: Regularly visually inspect the lift arm for any signs of wear‚ damage‚ or cracks. Address any issues promptly to prevent further deterioration.
Hydraulic Fluid Levels: Maintain proper hydraulic fluid levels in the 2025R’s hydraulic system. Refer to the John Deere operator’s manual for recommended fluid type and levels. Consistent maintenance ensures optimal performance and extends the life of the BXX10231 lift arm.
Troubleshooting Common Installation Issues
During BXX10231 installation on your 2025R‚ several issues may arise. Addressing these promptly ensures a functional and reliable lift arm system.
Hydraulic Leakage: If you encounter hydraulic leakage after connecting the lines‚ double-check all fittings for proper tightness. Inspect the hydraulic lines themselves for any cracks or damage. Ensure the correct fittings are used.
Lift Arm Binding: If the lift arm doesn’t move smoothly or binds during operation‚ verify that all pivot points are properly lubricated. Check for any obstructions or misalignment during installation.
Incorrect Geometry: If the lift arm geometry appears incorrect after installation‚ revisit the adjustment steps. Ensure the lift arm is aligned correctly with the tractor’s linkage and that all adjustments are secure.
Loose Fasteners: If fasteners loosen during initial operation‚ re-torque them to the specified values. Consider using thread-locking compound to prevent future loosening.
Incompatible Parts: Verify that the BXX10231 lift arm is compatible with your specific 2025R model. Refer to the parts diagram and component list to confirm correct part numbers. Online retailers like AGR24.ru can assist with compatibility checks.
If issues persist‚ consult a qualified John Deere technician for assistance.
Parts Diagram and Component List

The BXX10231 lift arm assembly comprises several key components. Understanding these parts is crucial for successful installation and future maintenance of your John Deere 2025R.
Key Components:
- Lift Arm (BXX10231): The primary component‚ providing the lifting force.
- Mounting Brackets: Secure the lift arm to the tractor frame.
- Pivot Pins: Allow for articulation and movement of the lift arm.
- Hydraulic Cylinder: Provides the hydraulic power for lifting.
- Hydraulic Lines & Fittings: Connect the cylinder to the tractor’s hydraulic system.
- Fasteners (Bolts‚ Nuts‚ Washers): Secure all components together.
Diagram Reference: Refer to the John Deere parts catalog for a detailed exploded view of the BXX10231 assembly. Online retailers like zapchasti-catalog.ru often display component images.
Component Sourcing: Replacement parts can be sourced from John Deere dealerships or authorized online distributors such as AGR24.ru. Ensure you use genuine John Deere parts or approved equivalents.
Part Numbers: Always verify part numbers before ordering to ensure compatibility. Incorrect parts can lead to installation issues and reduced performance.
Maintaining a parts list and diagram during installation aids in reassembly and future repairs.