
Honeywell T3 Installation Manual: A Comprehensive Guide
This manual details the Honeywell T3 Pro Smart Thermostat’s installation and operation. It covers package contents, wiring, setup, and troubleshooting for optimal home comfort control.
Understanding the Honeywell T3 Pro Thermostat
The Honeywell T3 Pro Smart Thermostat represents a significant advancement in home climate control, offering precise temperature regulation and a user-friendly experience. This programmable thermostat is designed for both wired and wireless applications, providing flexibility during installation. It boasts a clear, intuitive interface, simplifying operation for users of all technical levels.
Key features include flexible programming options – allowing for 7-day or 2-day schedules – to cater to diverse lifestyles and energy-saving preferences. The T3 Pro is compatible with various HVAC systems, ensuring broad applicability. Its compact design, with dimensions of 4.72 H x 5.9 W (or 120 mm H x 150 mm W) blends seamlessly into most home decors.
Furthermore, the thermostat supports Wi-Fi connectivity (depending on the model), enabling remote control and monitoring via a smartphone or tablet. This guide will walk you through the installation process, ensuring you harness the full potential of your Honeywell T3 Pro.
Package Contents Verification
Before beginning the installation of your Honeywell T3 Pro Smart Thermostat, carefully verify the contents of the package to ensure all necessary components are present. Your package should include the T3 Pro Thermostat unit itself, along with a UWP mounting system designed for easy and secure attachment to your wall.
Additionally, you’ll find a small decorative cover plate, available in dimensions of 4.72 H x 5.9 W (or 120 mm H x 150 mm W), to enhance the thermostat’s aesthetic appeal. Screws and anchors are provided for mounting, and two AA batteries are included to power the thermostat initially.
Crucially, confirm the presence of the Honeywell T3 thermostat literature, including this installation guide, for step-by-step instructions. If any items are missing, please contact Honeywell Home support immediately before proceeding with the installation process.
Safety Precautions Before Installation
Prior to commencing the installation of your Honeywell T3 Pro Smart Thermostat, strict adherence to safety precautions is paramount. Crucially, always disconnect power to your HVAC system at the breaker box to avoid electrical shock. Confirm the power is off using a non-contact voltage tester.
If you are uncomfortable working with electrical wiring, consult a qualified HVAC technician. Do not attempt installation if you lack experience. Carefully read and understand all installation instructions before beginning.
Protect your eyes by wearing safety glasses during wiring and mounting. Ensure the work area is well-lit and free of obstructions. Properly dispose of old batteries according to local regulations. Failure to follow these safety guidelines could result in personal injury or damage to your HVAC system. Always prioritize safety throughout the entire installation process.
Installation Process: Step-by-Step
Follow these detailed steps for a successful Honeywell T3 thermostat installation. This process includes power disconnection, wiring, mounting, and final setup procedures.
Step 1: Turning Off Power to Your HVAC System
Before beginning the Honeywell T3 thermostat installation, safety is paramount. Crucially, you must disconnect power to your heating, ventilation, and air conditioning (HVAC) system at the breaker box. Locate the breaker that controls your furnace and air conditioner – it’s often labeled, but if not, testing each breaker individually may be necessary.
Flip the breaker to the “OFF” position. To confirm the power is completely off, use a non-contact voltage tester at the existing thermostat wires. If the tester indicates no voltage, you can proceed with confidence. Failure to disconnect power can result in electrical shock or damage to your HVAC equipment and the new thermostat. Double-check that the system is truly off before touching any wires. This initial step is non-negotiable for a safe installation.
Remember to inform other household members that you are working on the HVAC system and that it will be temporarily unavailable.
Step 2: Removing Your Old Thermostat
With the power safely disconnected, you can now remove your existing thermostat. Begin by carefully removing the thermostat cover. This often snaps off or is held in place by small screws. Once the cover is removed, you’ll see the wiring connections. Before disconnecting any wires, it’s extremely important to label each wire with the corresponding terminal letter on the old thermostat’s base plate.
Use the provided labels or create your own using tape and a pen. Accurate labeling is crucial for correctly connecting the wires to the Honeywell T3. After labeling, carefully disconnect each wire from the old thermostat. Gently loosen the screws or release the clips holding the wires in place. Once all wires are disconnected, remove the old thermostat’s base plate from the wall.
Be mindful of any wall anchors or screws used to secure the old base plate, as you may need them for the new T3 installation.
Step 3: Identifying Your Wiring Configuration
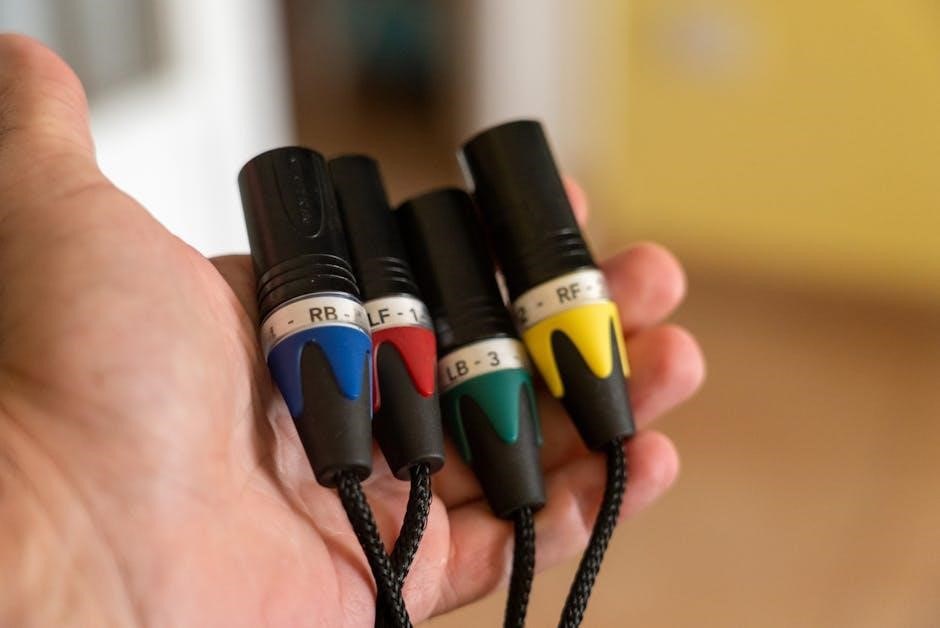
Now that your old thermostat is removed, identifying your wiring is critical for a successful Honeywell T3 installation. Carefully compare the labeled wires to determine your system’s configuration. Common wires include Red (Power), Green (Fan), White (Cool), and Yellow (Heat). However, configurations can vary.
A ‘C-wire’ (Common wire) is often blue and provides continuous power to the thermostat. The T3 Pro often requires a C-wire for optimal performance, though adapters are available if one isn’t present. If you have a system without a C-wire, consult the Honeywell documentation for adapter instructions. Identifying heat, cool, and fan wires is essential for proper operation.
If unsure, consult a qualified HVAC technician. Incorrect wiring can damage your system or the thermostat. Take a clear picture of your wiring before proceeding – this serves as a valuable reference.
Understanding C-Wire Requirements
The ‘C-wire,’ or Common wire, provides continuous 24V power to the Honeywell T3 thermostat, enabling consistent operation and access to smart features. Many newer smart thermostats, including the T3 Pro, function optimally with a C-wire connection. Without it, the thermostat may draw power from other wires, potentially causing HVAC system issues.
If your existing thermostat doesn’t have a C-wire, don’t worry! Honeywell offers C-wire adapters designed to repurpose existing wires. These adapters typically connect to the furnace control board. Installation of an adapter requires careful attention to the instructions and may involve working with low-voltage wiring.
Always consult the Honeywell documentation or a qualified HVAC professional if you’re unsure about C-wire requirements or adapter installation. Proper C-wire connection ensures reliable thermostat performance and prevents potential system malfunctions.
Identifying Heat, Cool, and Fan Wires
Before connecting the Honeywell T3, accurately identifying your existing thermostat wires is crucial. Typically, you’ll find wires labeled with letters corresponding to their function. The ‘R’ wire provides power, while ‘W’ controls heating. ‘Y’ activates cooling, and ‘G’ operates the fan.
Wire colors aren’t standardized, so rely on the labels on your old thermostat’s terminal block, not the wire color itself. Carefully document each wire’s connection before disconnecting anything. Take a photograph for reference! If labels are faded or missing, a multimeter can help identify live wires.
Some systems may have additional wires for auxiliary heat or other features. Refer to your HVAC system’s documentation or consult a professional if you encounter unfamiliar wiring. Incorrect wiring can damage your system or the thermostat, so double-check your connections.
Step 4: Mounting the T3 Thermostat Base Plate
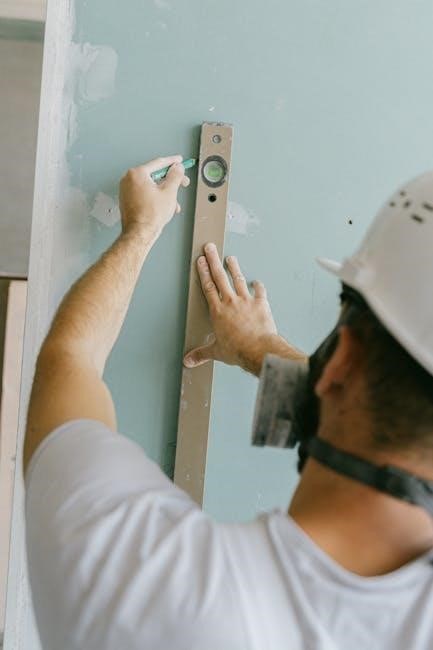
With the power off and wires correctly identified, you can now mount the Honeywell T3 thermostat base plate. Begin by positioning the base plate on the wall where your old thermostat was located, ensuring it covers the existing hole or marks. Use the included level to confirm the base plate is perfectly horizontal.
Mark the screw hole locations using a pencil. If mounting into drywall, use the provided anchors for a secure hold. Drill pilot holes if necessary, then carefully screw the base plate into the wall. Ensure the base plate is firmly attached and doesn’t wobble.
For a cleaner look, the T3 includes a decorative cover plate. This can be attached after the base plate is secured, concealing any imperfections in the wall. Proper mounting is essential for a stable and aesthetically pleasing installation.
Step 5: Connecting the Wires to the T3 Base Plate
Now, carefully connect the wires to the corresponding terminals on the T3 base plate. Refer to the wiring diagram you identified in Step 3, and double-check each connection. Typically, wires are secured by inserting them into the labeled terminals and gently tugging to ensure a firm grip.
The common (C-wire) is crucial for consistent power. Heat, cool, and fan wires should be connected to their respective terminals. Ensure no bare wire is exposed beyond the terminal. Incorrect wiring can damage the thermostat or your HVAC system.
If you encounter difficulty, revisit the wiring diagram and confirm your connections. A secure and accurate connection is vital for proper thermostat operation. Take your time and double-check everything before proceeding to the next step.
Step 6: Attaching the T3 Thermostat to the Base Plate
With the wires securely connected, carefully align the T3 thermostat with the mounted base plate. Gently press the thermostat onto the base plate until it clicks into place, ensuring a snug and secure fit. Avoid forcing it, as this could damage the thermostat or the base plate.
Once attached, verify that the thermostat is firmly seated and doesn’t wobble. A proper connection is essential for stable operation and accurate readings. Inspect the wiring again to ensure no wires were dislodged during attachment.
The decorative cover plate can now be attached, if desired, to conceal the base plate and wiring. This provides a cleaner, more aesthetically pleasing appearance. Your Honeywell T3 thermostat is now physically installed and ready for power-up and configuration.
Powering Up and Initial Setup
After installation, insert the provided AA batteries or restore power via the HVAC system. Verify the display illuminates, initiating the thermostat’s startup sequence and setup process.
Battery Installation
The Honeywell T3 Pro thermostat requires two AA batteries for initial power-up and as a backup power source. Locate the battery compartment, typically found on the rear of the thermostat unit after removing the front panel. Ensure correct battery polarity when inserting the AA batteries – match the positive (+) and negative (-) terminals as indicated inside the compartment.
Proper battery installation is crucial for reliable operation, even during power outages. The thermostat will initially operate solely on battery power, allowing you to complete the setup process before connecting to your HVAC system’s power.
Using fresh, high-quality AA batteries is recommended for optimal performance and longevity. Avoid mixing old and new batteries, or different battery types. The thermostat’s display will indicate low battery levels when replacement is needed, providing ample warning to prevent interruption of service.
Initial Power-Up and Display Check
After installing the batteries, or connecting to HVAC power (if applicable), the Honeywell T3 Pro thermostat should power on automatically. The display screen will illuminate, initiating a self-test sequence. Observe the display carefully for any error messages or unusual behavior during this initial startup phase.
A successful power-up will typically show the Honeywell logo, followed by a request to set the date and time. If the display remains blank, double-check the battery installation and ensure the thermostat is receiving power from your HVAC system. Verify the wiring connections if using HVAC power.
The display should be clear and easy to read, showing basic information like the current temperature and operating mode. If the display is dim or distorted, try adjusting the brightness settings within the thermostat’s menu. Familiarize yourself with the display icons and their meanings, as they provide vital information about your system’s status.
If issues persist, consult the troubleshooting section of this manual for further assistance.
Programming and Configuration
Customize your comfort! This section guides you through setting the date, time, temperature schedules, system settings, and optional Wi-Fi connectivity on your T3.
Setting the Date and Time
Accurate date and time settings are crucial for proper scheduling and operation of your Honeywell T3 Pro Thermostat. Upon initial power-up, or after a power outage, the thermostat will likely prompt you to set these parameters. Navigate to the settings menu using the thermostat’s interface – typically accessed via the menu button or a similar control.
Within the settings, locate the “Date and Time” option. You’ll generally be presented with separate fields for month, day, and year. Carefully input the correct values. Following the date, you’ll set the time, usually with options for hour and minute, and an indication of AM or PM.
Ensure you double-check your entries before saving. Some T3 models may also allow you to select a time zone, which is important for accurate scheduling, especially if your location observes daylight saving time. Saving the settings will apply the new date and time to the thermostat’s internal clock, enabling scheduled programs to function correctly.
Programming Temperature Schedules
The Honeywell T3 Pro thermostat excels in energy savings through programmable schedules. Access the programming menu via the thermostat’s interface. You’ll be able to create customized temperature settings for different times of the day and days of the week. This allows you to automatically adjust the temperature based on your occupancy and preferences.
The thermostat offers both 7-day and 2-day programming options. 7-day programming lets you set unique schedules for each day of the week, ideal for varied routines. 2-day programming allows a schedule for weekdays and a separate one for weekends, simplifying setup for consistent weekly patterns.
For each period (e.g., Wake, Leave, Return, Sleep), you’ll define a desired temperature. Carefully consider your comfort levels and energy-saving goals when setting these temperatures. Save your schedule, and the T3 will automatically adjust the heating and cooling to maintain your programmed settings.
7-Day vs. 2-Day Programming Options
The Honeywell T3 Pro thermostat provides flexibility in scheduling with its 7-day and 2-day programming modes. Choosing the right option depends on your weekly routine and desired level of control. The 7-day program is best suited for households with significantly different schedules each day – perhaps varying work hours or weekend activities.
With 7-day programming, you can customize temperature settings for every single day of the week, maximizing energy efficiency and comfort. Conversely, the 2-day program simplifies scheduling for those with consistent weekday and weekend routines.
This mode allows you to create one schedule for Monday through Friday and another for Saturday and Sunday; Selecting 2-day programming reduces setup time while still providing automated temperature adjustments. Consider your lifestyle when deciding; detailed control or streamlined simplicity – the T3 adapts to your needs.
Configuring System Settings
The Honeywell T3 Pro thermostat offers a range of system settings to personalize your heating and cooling experience. Accessing these settings allows you to fine-tune the thermostat’s behavior to match your specific HVAC system and preferences; Key settings include cycle rate, temperature display format (Fahrenheit or Celsius), and swing temperature adjustment.
Cycle rate controls how frequently your HVAC system turns on and off, impacting comfort and energy usage; Adjusting the swing temperature determines the temperature range around your setpoint before the system activates. Further customization includes options for auto-changing, filter reminders, and display brightness.
Properly configuring these settings ensures optimal performance and efficiency. Refer to the on-screen prompts and the full manual for detailed explanations of each option. Tailoring these settings to your home’s unique characteristics will maximize the benefits of your T3 Pro thermostat.
Connecting to Wi-Fi (If Applicable)
The Honeywell T3 Pro thermostat, depending on the model, offers Wi-Fi connectivity for remote control and advanced features. To connect, navigate to the network settings within the thermostat’s menu. The thermostat will scan for available Wi-Fi networks in your area. Select your network from the list and enter your password when prompted, using the on-screen keyboard.
Once connected, the thermostat will display a confirmation message and synchronize with the Honeywell Home app. This allows you to control your home’s temperature from your smartphone or tablet, receive alerts, and access energy usage reports. Ensure a stable Wi-Fi signal for reliable connectivity.
Troubleshooting connection issues may involve restarting the thermostat or your router. Refer to the Honeywell Home support website for further assistance and detailed instructions on setting up and managing your Wi-Fi connection.

Troubleshooting Common Issues
This section addresses frequent problems with the Honeywell T3, including power failures, inaccurate readings, Wi-Fi connectivity, and HVAC system responsiveness.
Thermostat Not Powering On
If your Honeywell T3 thermostat fails to power on, begin with the simplest checks. First, verify the batteries. Even if the thermostat is intended to be powered by a common (C-wire), depleted batteries can prevent initial startup or operation during power outages. Replace both AA batteries with fresh ones, ensuring correct polarity.
Next, confirm the HVAC system’s power switch is on. A tripped breaker or a switched-off power supply to the furnace or air handler will obviously prevent the thermostat from receiving power. Check your electrical panel.
Inspect the wiring connections at both the thermostat base plate and the HVAC system. A loose or improperly connected wire can interrupt the power supply. Ensure all wires are securely fastened to their respective terminals. If a C-wire is required and not present, consider installing one or using a C-wire adapter. Finally, double-check the thermostat’s mounting; a poor connection to the base plate can also cause power issues.
If these steps don’t resolve the issue, consult a qualified HVAC technician.
Incorrect Temperature Readings
If your Honeywell T3 thermostat displays inaccurate temperature readings, several factors could be at play. First, ensure the thermostat isn’t directly exposed to sunlight, drafts, or heat-generating appliances. These external influences can skew the temperature sensor’s readings. Relocating the thermostat, if possible, can improve accuracy.

Verify the thermostat’s location isn’t near exterior walls or poorly insulated areas. These spots are prone to temperature fluctuations. Check for obstructions blocking airflow around the thermostat; furniture or curtains can interfere with accurate sensing.
Calibrate the thermostat if it offers a calibration setting. This allows you to adjust the displayed temperature to match a known accurate thermometer. Confirm the thermostat is set to the correct temperature scale (Fahrenheit or Celsius). Finally, consider a sensor reset, if available in the settings menu. If issues persist, contact a professional for assistance.
Wi-Fi Connection Problems
Experiencing difficulty connecting your Honeywell T3 thermostat to Wi-Fi? Begin by verifying your home network is functioning correctly and that your smartphone or tablet is connected. Ensure you’re entering the correct Wi-Fi password – capitalization matters! Confirm your router is broadcasting on the 2.4 GHz band, as many smart thermostats don’t support 5 GHz.
Check the distance between the thermostat and your router; excessive distance can weaken the signal. Try temporarily moving the thermostat closer to the router during setup. Restart both your router and the thermostat – a simple reboot often resolves connectivity issues.
Confirm your router’s firewall isn’t blocking the thermostat’s connection. Consult your router’s documentation for instructions on adjusting firewall settings. Update the thermostat’s firmware to the latest version, as updates often include connectivity improvements. If problems continue, consult Honeywell’s support resources or contact a professional.
HVAC System Not Responding
If your HVAC system isn’t responding after installing the Honeywell T3, first double-check all wiring connections at both the thermostat and the HVAC unit. Ensure wires are securely fastened to the correct terminals, referencing your wiring diagram. Verify the power switch to your HVAC system is turned on. A tripped circuit breaker could also be the culprit – check your electrical panel.
Confirm the thermostat is set to the correct mode (Heat, Cool, or Auto) and that the set temperature is appropriately higher or lower than the current room temperature. Check the thermostat’s battery level; low batteries can sometimes cause intermittent issues.
If using a C-wire, ensure it’s properly connected. A missing or incorrectly connected C-wire is a common cause of HVAC system incompatibility. If problems persist, consult a qualified HVAC technician to diagnose and resolve the issue.