
Legrand Light Switch Manual: A Comprehensive Guide
This manual provides detailed instructions for installing and troubleshooting Legrand adorne and radiant light switches‚ ensuring safe and reliable operation within NEC guidelines․

Understanding Legrand Adorne Systems
The Legrand Adorne system represents a sophisticated approach to lighting control‚ offering a modular and aesthetically pleasing design․ It’s built around a core set of components – switches‚ dimmers‚ outlets‚ and accessories – all designed to work seamlessly together․
Adorne’s key feature is its snap-in mechanism‚ allowing for easy installation and customization․ Unlike traditional systems‚ Adorne devices are designed to be used only with other Adorne components; they are not compatible with standard switches or wall plates․ This ensures a consistent look and reliable performance․
The system supports various configurations‚ from simple single-pole switches to complex 3-way and 4-way setups․ Understanding the Adorne ecosystem is crucial for successful installation and achieving the desired lighting control functionality․ Proper wiring and component selection are paramount for optimal results․

Legrand Radiant Collection Overview
The Legrand Radiant Collection offers a distinct aesthetic compared to the Adorne system‚ focusing on a more traditional yet refined appearance․ While sharing Legrand’s commitment to quality‚ Radiant features classic designs and finishes‚ providing a versatile option for various interior styles․
Radiant switches and dimmers utilize a screw-in mounting system‚ differing from Adorne’s snap-in approach․ This collection also includes coordinating accessories like nightlights and USB outlets‚ expanding functionality beyond basic switching․
Like Adorne‚ Radiant devices require adherence to applicable regulations and NEC codes during installation․ Understanding the specific wiring requirements for Radiant components is essential for safe and reliable operation․ Careful attention to detail during the installation process ensures a polished and functional lighting solution;
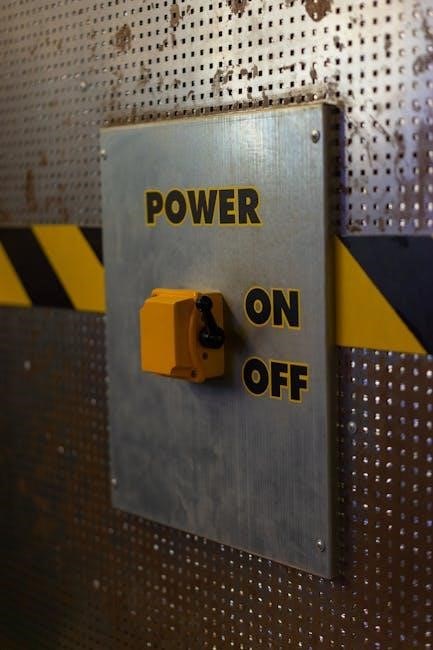
Safety Precautions Before Installation
Crucially‚ always disconnect power at the circuit breaker or fuse box before commencing any electrical work․ Verify the power is off using a non-contact voltage tester․ Failure to do so presents a serious risk of electric shock․ This is paramount for personal safety․
Inspect all wiring for damage or wear․ Replace any compromised wires before installation․ Ensure the electrical box is securely mounted and appropriately sized for the switch․ Never attempt installation in damp or wet conditions․
If you are uncomfortable or unfamiliar with electrical wiring‚ consult a qualified electrician․ Adherence to local and NEC codes is mandatory․ Improper installation can lead to fire hazards or electrical malfunctions․ Prioritize safety above all else throughout the entire process․
Tools Required for Installation
For a successful Legrand light switch installation‚ gather these essential tools beforehand․ A screwdriver set – both flathead and Phillips head – is fundamental for terminal connections and mounting․ Wire strippers are necessary for preparing wire ends‚ ensuring clean and secure connections․
A non-contact voltage tester is vital to confirm power is completely off before handling any wires․ Pliers can assist with bending and manipulating wires within the electrical box․ A level ensures the switch is mounted straight for aesthetic appeal․
Consider a wire connector tool for faster and more reliable connections․ A flashlight illuminates the work area‚ especially in dimly lit boxes․ Safety glasses protect your eyes from debris․ Having these tools readily available streamlines the installation process․
Wiring Diagrams & Configurations
Explore detailed wiring schematics for single-pole‚ 3-way‚ and 4-way switches‚ including configurations with neutral wires‚ to ensure correct Legrand switch functionality․
Single-Pole Switch Wiring
Wiring a Legrand single-pole switch is a straightforward process‚ essential for controlling a light fixture from one location․ Begin by identifying the hot (usually black)‚ neutral (white)‚ and ground (green or bare) wires within the electrical box․ Connect the hot wire to the common terminal on the switch – typically a darker color․ The neutral wire does not connect to the switch itself‚ but rather continues through the box to the light fixture․
Crucially‚ the ground wire must be securely connected to the grounding screw on the switch and the metal electrical box‚ if applicable‚ for safety․ Carefully fold the wires into the box‚ avoiding any pinching or strain․ Ensure all connections are tight before proceeding․ Refer to the Legrand wiring diagram (often found within the product packaging or online) for a visual guide․ Incorrect wiring can lead to malfunction or safety hazards‚ so double-check your work!
3-Way Switch Wiring – Detailed Explanation
Legrand 3-way switch wiring allows controlling a single light fixture from two different locations․ This involves identifying the “line” (power source)‚ “load” (to the light)‚ and “traveler” wires․ The common terminal on each switch connects to either the line or load‚ while the two traveler wires connect the two switches together․
It’s vital to correctly identify the common terminal – often indicated by a different color screw․ The neutral wire bypasses the switches‚ connecting directly to the light fixture․ Ground wires must be connected to both switches and the electrical box․ A pilot light illuminating when the circuit is on is normal in some configurations․ Carefully follow the Legrand wiring diagram (specifically the one labeled for 3-way wiring) to ensure correct connections‚ as miswiring can cause erratic operation․
4-Way Switch Wiring – Advanced Setup
A 4-way switch system enables controlling a light from three or more locations‚ building upon the principles of 3-way wiring․ It requires two 3-way switches at each end and one or more 4-way switches in between․ The 4-way switch doesn’t have a “common” terminal; instead‚ it features four traveler terminals that re-route the electrical path․
Wiring involves connecting the traveler wires from the first 3-way switch to two traveler terminals on the first 4-way switch‚ and then connecting the remaining two traveler terminals on the 4-way switch to the second 3-way switch․ Proper identification of traveler wires is crucial․ Always consult the Legrand wiring diagram for a visual guide‚ ensuring correct connections for seamless multi-location control․ Incorrect wiring will lead to unpredictable behavior․
Wiring with Neutral Wire – Common Configurations
Many modern Legrand switches‚ particularly smart or dimming models‚ require a neutral wire connection for proper functionality․ Traditionally‚ neutral wires weren’t always brought to switch boxes‚ but current electrical codes often mandate it․ When present‚ the neutral wire (typically white) provides a return path for current‚ essential for these advanced switches․

Common configurations involve connecting the neutral wire to the designated neutral terminal on the switch․ In some cases‚ like with certain 3-way setups‚ the neutral might be shared within the box․ Always refer to the specific Legrand wiring diagram for your switch model․ Incorrect neutral wiring can cause the switch to malfunction or create a safety hazard․ Ensure secure connections and proper wire insulation․

Installation Process – Step-by-Step
Begin by preparing the electrical box‚ carefully connecting wires to identified terminals‚ mounting the switch frame‚ and finally‚ snapping the wall plate securely into place․
Preparing the Electrical Box
Before commencing installation‚ ensure the power to the circuit is completely switched off at the breaker panel․ Carefully remove the existing switch from the electrical box‚ disconnecting the wires․ Inspect the box for any damage and ensure it’s securely mounted․ Gently fold the wires into the box‚ taking care not to strain or damage them․
Confirm sufficient space exists within the box to accommodate the Legrand switch and its wiring; overcrowding can lead to connection issues․ If necessary‚ consider using a larger electrical box․ Ensure the wires are stripped to the appropriate length‚ typically around ¾ inch‚ for secure terminal connections․ Proper preparation of the electrical box is crucial for a safe and successful installation‚ preventing future complications and ensuring reliable operation of your Legrand light switch․
Connecting the Wires – Terminal Identification
Legrand switches utilize clearly marked terminals for easy wire connection․ Typically‚ a ground wire (bare copper or green) connects to the green grounding screw․ Line (hot) and Load wires connect to the brass or dark-colored terminals․ In 3-way setups‚ identify the common wire – often black – and connect it to the designated common terminal․ Traveler wires‚ usually red and another color‚ connect to the remaining traveler terminals․
When a neutral wire is present‚ connect it to the silver-colored terminal․ Securely tighten each screw‚ ensuring a firm connection without over-tightening․ Refer to the specific wiring diagram included with your Legrand switch model for precise terminal locations․ Correct terminal identification is paramount for proper switch functionality and electrical safety․
Mounting the Switch Frame
After connecting the wires‚ carefully fold them into the electrical box‚ ensuring no wires are pinched or stressed․ Align the Legrand switch frame with the mounting holes in the electrical box․ Gently push the frame into the box‚ ensuring it sits flush against the wall surface․ Secure the frame using the provided mounting screws․
Do not overtighten the screws‚ as this could damage the frame or the electrical box․ Ensure the frame is level and securely attached before proceeding․ The frame provides a stable base for the switch mechanism and wall plate․ A properly mounted frame is crucial for a professional-looking installation and long-term durability․
Snapping the Wall Plate into Place
Once the switch is securely mounted within the frame‚ carefully align the wall plate with the frame․ Gently press the wall plate onto the frame‚ starting at the top and working your way down․ You should hear a series of clicks as the wall plate snaps into place‚ indicating a secure connection․
Ensure all edges of the wall plate are flush against the wall‚ and there are no gaps between the plate and the frame․ Avoid forcing the wall plate‚ as this could damage the locking mechanisms․ A properly installed wall plate provides a finished look and protects the switch mechanism from dust and debris․

Troubleshooting Common Issues
This section details solutions for frequent problems like switches failing to operate‚ persistent pilot lights‚ or incorrect 3-way functionality‚ ensuring proper operation․
Switch Doesn’t Turn On – Possible Causes
If your Legrand light switch isn’t functioning‚ several issues could be at play․ First‚ verify the circuit breaker hasn’t tripped; a simple reset might resolve the problem․ Carefully inspect all wire connections within the electrical box‚ ensuring they are secure and properly connected to the correct terminals – loose connections are a common culprit․
Confirm the switch is compatible with the bulb type; some LEDs require specific switch types․ Double-check the wiring diagram to ensure correct installation‚ paying close attention to the line and load wires․ A faulty switch itself is also a possibility‚ requiring replacement․ If the issue persists‚ and you’re comfortable‚ use a voltage tester to confirm power is reaching the switch․ Remember to always prioritize safety and disconnect power before inspecting wiring․
Pilot Light Remains Lit – Explanation & Solutions
A persistently lit pilot light on your Legrand switch typically indicates the circuit is receiving power even when the switch is in the “off” position․ This is normal behavior for 3-way switch configurations when another switch in the circuit is active․ However‚ if the light remains on regardless of other switch positions‚ it suggests a wiring issue or a faulty switch․
Inspect the wiring diagram to confirm the neutral wire is correctly connected‚ as improper neutral connections can cause this․ Ensure the common terminal is correctly identified and wired․ If the problem persists‚ try swapping the traveler wires in a 3-way setup․ If none of these steps resolve the issue‚ the switch itself may be defective and require replacement․ Always disconnect power before troubleshooting․
Incorrect 3-Way Switch Operation – Diagnosis

If your Legrand 3-way switch isn’t functioning as expected – for example‚ one switch doesn’t control the light‚ or the light operates unexpectedly – a systematic diagnosis is crucial․ Begin by verifying the wiring against the correct diagram for your specific setup‚ paying close attention to traveler wire placement; Incorrect traveler connections are the most common cause of issues․
Next‚ check the common terminal connections at both switches․ Swapping the traveler wires can sometimes resolve the problem․ If the issue persists‚ ensure the neutral wire is properly connected․ A faulty switch can also cause erratic behavior; try temporarily replacing one switch to isolate the problem․ Remember to always disconnect power before any wiring adjustments․
Dealing with Neutral Wire Issues
Neutral wire problems can manifest as flickering lights‚ switches that don’t operate correctly‚ or even a complete circuit failure․ Ensure the neutral wire is securely connected to both the switch (if required by the model) and the electrical box․ A loose connection is a frequent culprit․ If the neutral wire is shared with other devices‚ verify those devices aren’t causing a voltage drop or overload․
In some installations‚ the neutral wire may be connected to the same Romex as the 3-way traveler․ Carefully inspect all connections for tightness and proper insulation․ If you suspect a damaged neutral wire‚ consult a qualified electrician immediately․ Never attempt to bypass or disconnect the neutral wire‚ as this poses a significant safety hazard․

Legrand Support & Resources

For assistance‚ contact Legrand Technical Support at 844-957-3783 (Option 1‚ then Option 2)‚ Monday-Friday‚ 8am-6pm EST‚ for expert guidance․
Contacting Legrand Technical Support (844-957-3783)
If you encounter difficulties during installation or troubleshooting your Legrand light switch‚ their dedicated technical support team is readily available to assist․ You can reach them by calling 844-957-3783․ When prompted‚ select Option 1‚ and then follow with Option 2 to specifically connect with a Technical Support representative․
Please note that support services are available Monday through Friday‚ from 8:00 AM to 6:00 PM Eastern Standard Time‚ excluding observed holidays․ Having your Legrand product model number and a detailed description of the issue will expedite the support process․ Be prepared to discuss the wiring configuration and any error messages you may be experiencing․ Legrand’s team is committed to providing clear and effective solutions to ensure your satisfaction․
Applicable Regulations & Codes (NEC)
All Legrand light switch installations must adhere to all applicable local‚ regional‚ and national electrical codes‚ with specific emphasis on the National Electrical Code (NEC)․ It is the installer’s responsibility to ensure full compliance with these regulations to guarantee a safe and functional electrical system․
Key NEC considerations include proper grounding‚ wire sizing‚ and circuit protection․ Always disconnect power at the breaker before commencing any electrical work․ Ensure the electrical box is appropriately sized for the switch and wiring․ Adherence to NEC standards is crucial for preventing electrical hazards and ensuring the longevity of the installation․ Consult a qualified electrician if you are unsure about any aspect of the electrical code requirements․
Cleaning and Maintenance Instructions
To maintain the aesthetic appearance and optimal functionality of your Legrand light switch‚ regular cleaning is recommended․ Always begin by disconnecting power to the switch at the breaker to ensure safety․ Use a soft‚ dry cloth to gently wipe the wall plate and switch surface‚ removing dust and smudges․
Avoid using abrasive cleaners‚ solvents‚ or excessive moisture‚ as these can damage the finish․ Never apply cleaner directly to the switch or wall plate; instead‚ apply it to the cloth first․ For stubborn marks‚ a slightly dampened cloth with mild soap may be used‚ followed by a dry wipe; Regular‚ gentle cleaning will preserve the switch’s appearance and prevent buildup of contaminants․
Warranty Information & Registration
Legrand offers a warranty on its light switches‚ protecting against defects in materials and workmanship․ The specific warranty period varies depending on the product line – adorne and radiant collections may have differing terms․ To understand the full extent of your coverage‚ please refer to the warranty documentation included with your purchase or visit the Legrand website․
Product registration is highly recommended‚ as it allows Legrand to efficiently process warranty claims and provide important product updates․ You can typically register your switch online through the Legrand website using the product’s model number and date of purchase․ Retain your proof of purchase for warranty service․